Purchase Orders
Purchase Orders are basically a permission slip to purchase something. A Purchase Order (PO) is a written authorization for a supplier/Vendor to ship products at a specified price. POs are used to control and verify purchases, pricing, and terms. Your company should use POs and be very strict about their usage.
Purchase Orders can be used to see how many items are on order and the expected arrival time of the shipment. Purchase Orders may also be used to order Non-Inventory items, such as office supplies, furniture, computers, company tools etc.
Purchase Orders are a very important part of a proper and complete accounting system for any company. Purchase Orders are to be completed by authorized personnel only. They allow managers to ‘authorize’ purchases. Vendors should be notified that no one may buy from them unless the purchase includes a PO number. When Vendor Bills arrive at your office, the bookkeeping department can see what was ordered and what the buyer had planned to pay for it. In the case of parts, bookkeeping will know to which Customer or Job to attribute the COGS. In the case of supplies, bookkeeping will know to which department to attribute the Expense. This is necessary for properly departmentalizing financial data.
Purchase Orders are used for audit security and do not affect any accounts. Your accounts are not affected until a transaction has been posted for the goods on the PO. These types of transactions are listed below:
- Receiving the Items allows for you to receive Inventory and recognize it in stock when you haven’t received a Bill yet. It does not affect financials.
- Entering a Bill for received items increases Inventory Asses and Accounts Liability.
- Paying a Bill decreases cash on hand and decrease liabilities.
- Selling the Items increases Income, Accounts Receivable or COGS/Expenses and decreases Inventory Asset for Inventory.
Please note: Your Direct Cost of the purchase is what is on the PO, NOT the retail price.
Prior to implementing Purchase Orders, you will need to setup your preferences.
New Purchase Order
To create a new Purchase Order, select Vendors from the main Menu, then select New PO. You may also create a purchase order from several other areas including work orders, work order list, schedule board wo, invoice, sale, estimate, and more.
There is also a Copy feature on the purchase order (under the Menu button).
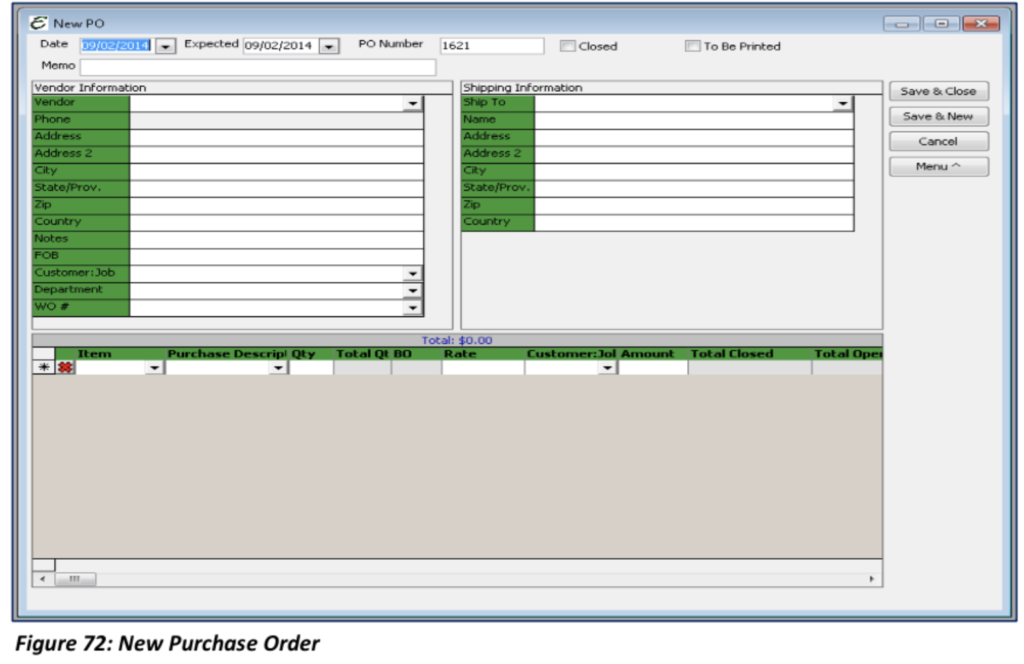
Purchase Order Basic Information

Date: Today’s date will automatically populate in this field. It can be modified if necessary
.Expected Date: This is the date you expect the items to arrive. You can only have one date for all items. If you are expecting items to arrive at different dates, you might consider two or more POs. Today‘s date will automatically populate in this field. It can be modified if necessary.
PO Number: The next available number in sequence will automatically populate this field. It can be changed if necessary.
Tip: Save quickly to claim thus PO number. Only when the PO is saved, is that number actually claimed.
Memo: Enter any brief information for tracking purposes. It appears on various screens. It does not appear on the printed Purchase Order. To record large amounts of information, use the Details feature from the side Menu option. (Each “Memo” field should be utilized to communicate with all users the purpose of the corresponding transaction. This field will also provide documentation and audit security.)
Please note: It is highly recommended that a short description of the PO be added here.
Vendor Information
Vendor Information: Select the Vendor from the drop-down menu. The Vendor’s address, city, and state will automatically be filled in if you have this information already set up in the Vendor’s record.
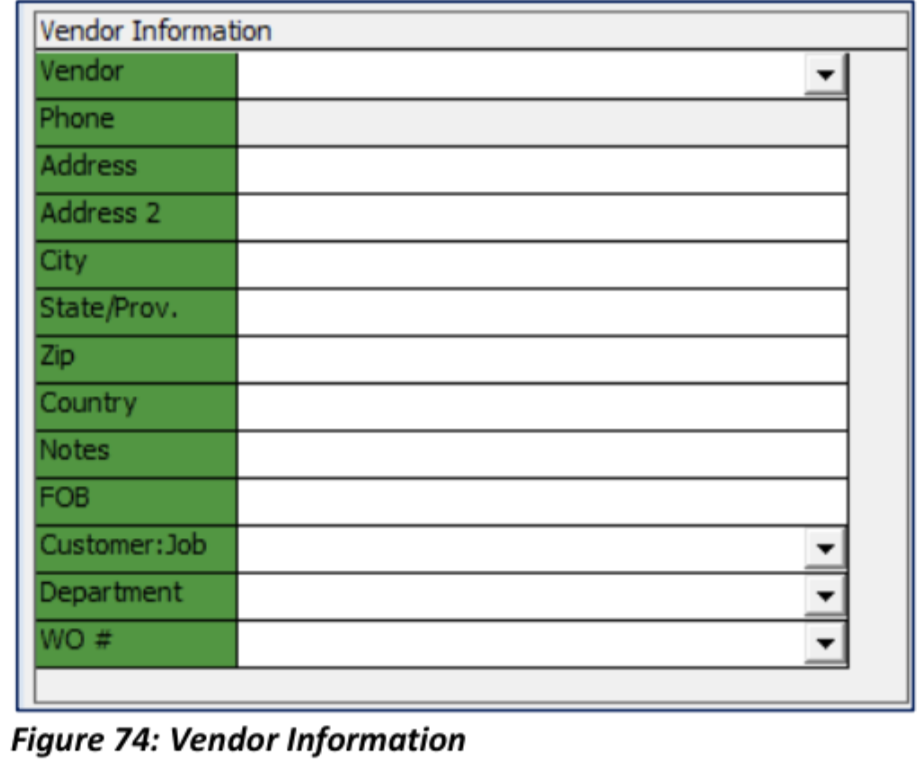
Notes: Much like the memo field, enter any brief information to track. This information however willappear on the printed Purchase Order. To record large amounts of information, use the Details feature from the side Menu option.
FOB: Use this field to enter “Destination” or “Shipping” if these terms have been set up between you and your Vendors.
Customer (Vendor Information Area): The Customer:Job field in the Vendor Information area is used to populate the Customer field in the Purchase Order Item area. Each Item has its own Customer field, in case you are ordering parts for multiple jobs on a single Purchase Order. The Customer field in the Invoice Item area can also be populated with the recipient selected in the “Ship To” field, but only if the Customer field in the Vendor Information is blank. If both the Customer field in the Vendor Information area and the Ship To field in the Shipping Information are populated, the Customer field takes the priority in the Customer field of each Item.
Department: If ordering the Item(s) for use in a department, select that department from the drop-down menu. If the Vendor has a Default Department, that Department will auto populate here.
WO: The WO field is used to indicate the Work Order to which the line item is associated. If the Customer field has not been filled in, the WO drop-down list will only make available <Lookup> as a selection. Clicking <Lookup> will open the Work Order Lookup List, which can be used to look up any Work Order in the system. Double clicking on a Work Order will populate both the Customer field and the WO field in the Purchase Order.
Tip: Your warehouse manager or purchasing manager can be setup as a vendor. Employees, and especially mobile users, can create purchase orders and select that person as the vendor. That user can check your company’s inventory to be sure we are not ordering something that we already have. They can slip out the PO, if needed, and decide the best place to order the item(s).
Shipping Information
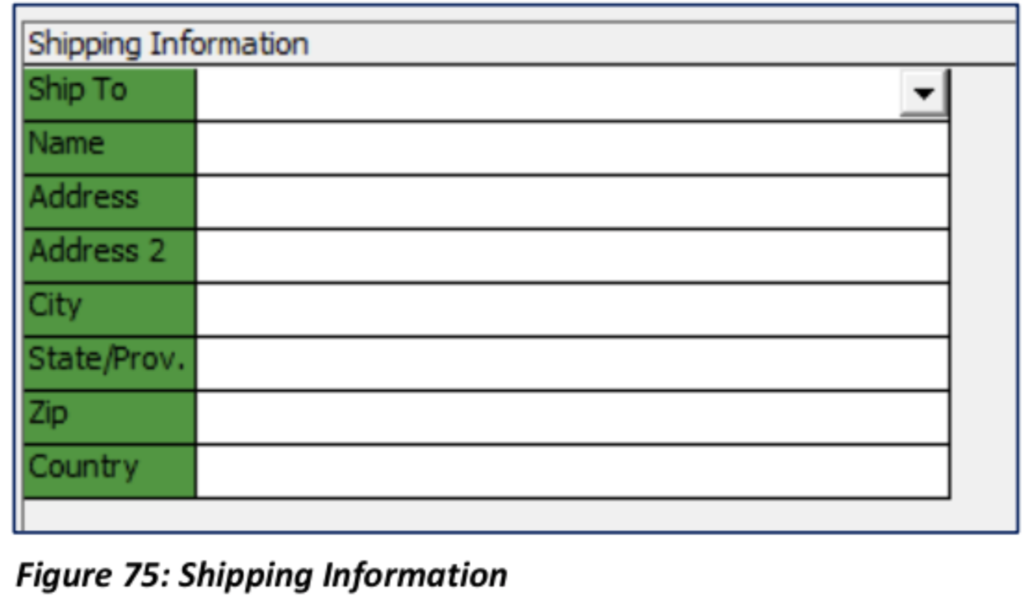
Ship To: The “Ship To” field will default to your company headquarters. To set a different “Ship To” location, select from the drop-down menu, the company name where you want the Items shipped. If the Customer field in the Vendor Information area is blank, the “Ship To” recipient will be proposed in the Customer field of each Invoice Item.
Item Information

Item: Select from the drop-down menu the Item(s) you are wishing to purchase. If the Item is not in the list you must set up a new InvoiceItem.
Purchase Description: The purchase description of the Item will automatically populate from the Item. Modifications to the Purchase Description will not change the Item’s Purchase Description.
Qty: Enter the quantity to order.
Total Qty: Displays the current number of Items on hand.
BO: Displays the current number of Items that are back ordered.
Rate: Populates based off your Purchase Order Rate Preference.
Customer (Invoice Item Area): Earmarks that individual line item to a particular Customer, which is selected from the drop-downlist. This field can be automatically populated based upon either the selection in the Customer field of the Vendor Information area, or the selection in the “Ship To” field of the Shipping Information area. This field can always be overridden, even if a proposal exists.
Amount: The amount of that line item will show in the amount field. This is calculated based on Rate times the Quantity.
Total Closed: When items are received against the PO, Total Closed will reflect that received item amount.
Item Information (continued)

Total Open: This reflects the Total Amount still open for the Purchase Order Item.
Department: Populates from Department within Vendor Information or can be selected.
Rcv’d: Any quantities that have been received against the Purchase Orderwill show inthis column.
Closed: If necessary, this check box may manually be selected in order to close this line item (cancel, void etc.). Under normal circumstances, this happens automatically as Items are received from Vendors. When this isc hecked, you will NOT be reminded that there is an open PO when you enter a Bill for that Vendor.
Reimbursable: Used in conjunction with the Customer field, will add the line Item to that Customer’s Reimbursable List, found on an Invoice. You do not have to receive an item for it to appear on the Reimbursable List. There is a Preference to automatically check this box when a Customer:Job is selected.
Sales Description: The Sales Description of the Item will automatically populate. Modifications to the Sales Description will not change the Item’s Sales Description. The Sales Description can be modified on the Purchase Order for use on Customer Invoice later when marked as Reimbursable and placed on the Customer’s Invoice.
Total: The total of the Purchase Orderwill appear just above the line items.
Notes: Much like the memo field, enter any brief information to track per Item. To record large amounts of information, use the Details feature from the side Menu option.
Please note: As with other lists, Right-Click to access Form Preferences to add or remove columns in the list.
Purchase Order: Menu Options
The Purchase Order, like many of the forms within Total Office Manager has extended functionality within its side Menu.
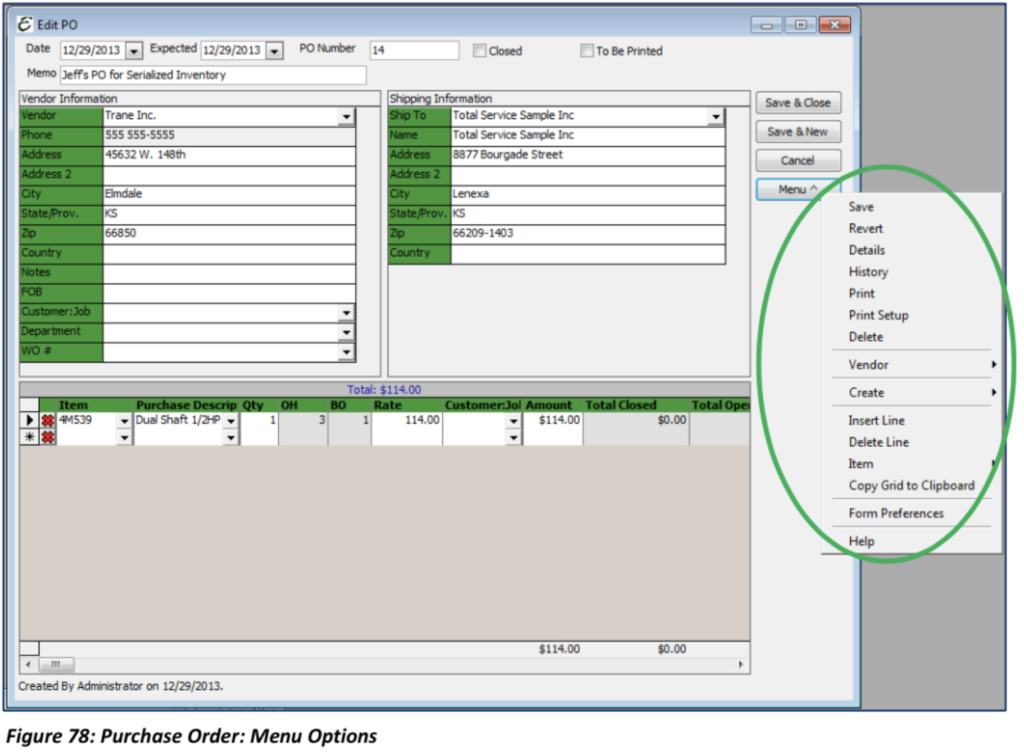
Save: Manually saves the form.
Revert: Causes the form to dismiss any changes and returns the information contained after the last save. It is the same as canceling the record without saving changes, and then re-opening the record.
Details: Opens a notepad for that specific Purchase Order which can beused to record miscellaneous information in larger quantities than the memo field or the notes field can handle. These details do appear on the printed Purchase Order.
History: Opens the history for that Purchase Order.
Print/E-mail: Saves the information on the form and opens the print dialog form. There you can print or even email the Purchase Order as a PDF file. The Purchase Order is converted to a PDF and attached to an email that you may then modify and send. You will need to have email already set up. (Outlook or Outlook Express). This email feature will not work with any web-based email clients.
Delete: Deletes the Purchase Order. This function may not always be available, depending on the extent to which other transactions related to the Purchase Orderhave taken place.
Edit Vendor: Provides a convenient way to edit the Vendor record while editing a Purchase Order.
Create Invoice: Provides a convenient way to create a new Invoice from a Purchase Order. Done this way, the Items contained in the original Purchase Order are automatically added in the new Invoice.
Create Sale: Provides a convenient way to create a new Sale from a Purchase Order. Done this way, the Items contained in the original Purchase Order are automatically added to the new Sale form.
Create Work Order: Provides a convenient way to create a Work Order from a Purchase Order. Items from a Purchase Order will carry toa Work Order if the Preference is enabled to include Purchase Order Items automatically on a new Work Order. This Preference can be found within Edit│Preferences│Work Order│Company Preferences│Include PO Automatically on new WO. There are two types of Work Orders to choose from: Single Work Order and Per Customer.
Create Work Order│Single Work Order: When created, you will need complete the Work Order. The only items that are auto populated from the Purchase Order are the Client PO and the Items from the Purchase Order.
Create Work Order│Per Customer: When created, the Work Order is auto populated with the Customer:Job information provided on the Purchase Order. You may modify information as needed.
Create Item Receipt: Provides a convenient way to create an Item Receipt Only from the Purchase Order. Done this way, the Items contained in the original Purchase Order are automatically added to the new Item Receipt Only form.
Insert Line: This command inserts a blank line immediately above any highlighted Itemline.
Delete Line: This command deletes any highlighted Invoice Item. Clicking the “x” to the left of an Itemwill also delete that particular line item.
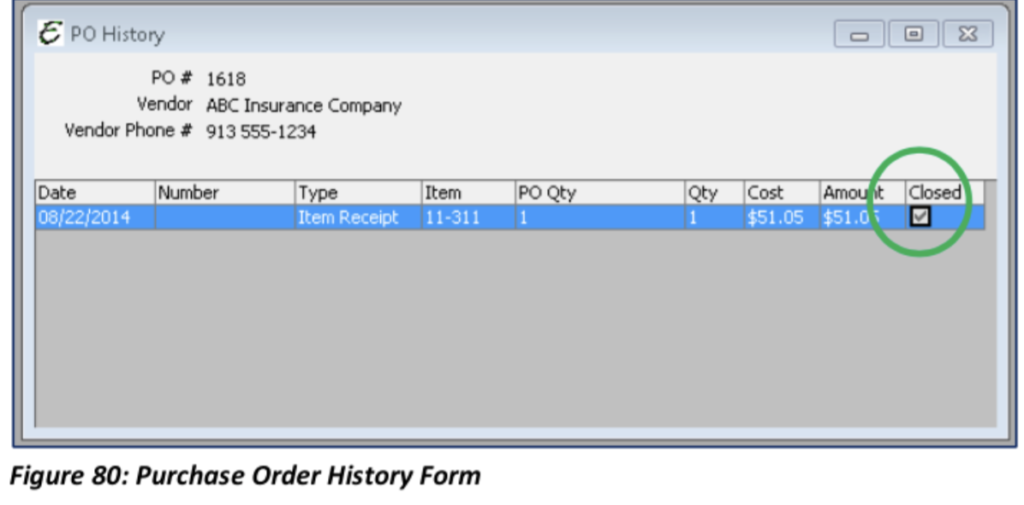
Purchase Order History
The Purchase Order History form quickly displays the history of Items appearing on a Purchase Order. To view this History, open the Purchase Order List. From the Vendors main Menu option select Purchase Order List. Right-Click on a Purchase Order and select History.
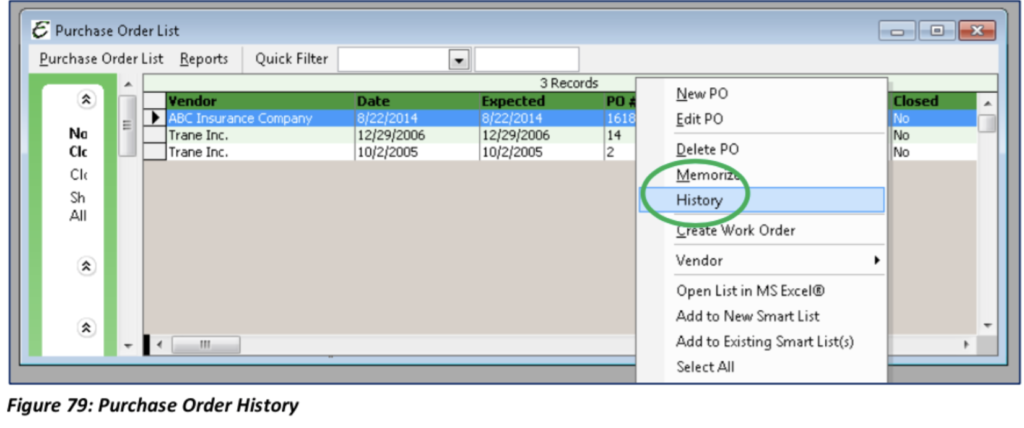
Use the Purchase Order History form to quickly see the status and history of Items appearing on a single Purchase Order. In the Purchase Order History form entered shows that the Items on this Purchase Order have been received, but the Bill has not been paid. This is indicated by the Closed status on each line item. On the Purchase Order List this Purchase Order is not closed because not all Items on the Purchase Order have been received. On the Purchase Order History, the Closed check box is selected denoting that this specific Item has been received.