Receiving payment from your Customers for products and services delivered/performed is an essential function in keeping your business running. This section will explore the many ways payment can be accepted from your Customers.
Estimates
Simply stated, an estimate is used to describe a job and calculate its approximate cost to a customer. However, in Total Office Manager the functionality of an estimate goes well beyond this brief description.
- A pick ticket can be generated from the estimate, and then sent to the warehouse for the necessary parts to be gathered.
- If changes are made to the estimate, a change order is automatically generated and can be added to the estimate’s details (notes).
- Either an invoice for the full amount, or progress invoices for a percentage of the original amount can be created from an estimate.
- Sales receipts for immediately paid work, plus credit memos, work orders, and purchase orders can all be created from the original estimate as well, preserving the entire “flow” of efforts involved in the job.
To access the “New Estimate” form, select Customers from the Menu bar and click Create Estimate. The keyboard shortcut for this is Ctrl+E.
Invoices
When payment is expected at a later date than when work was performed, or goods are rendered, the New Invoice form is typically used to record the transaction. Example: You perform a service call and the customer is allowed to pay you at some point in the future. You then send an invoice to the customer and wait for a payment to arrive at a later date.
To access the “New Invoice” form, select Customers from the Menu bar then click New Invoice. The keyboard shortcut for this form is Ctrl+I.
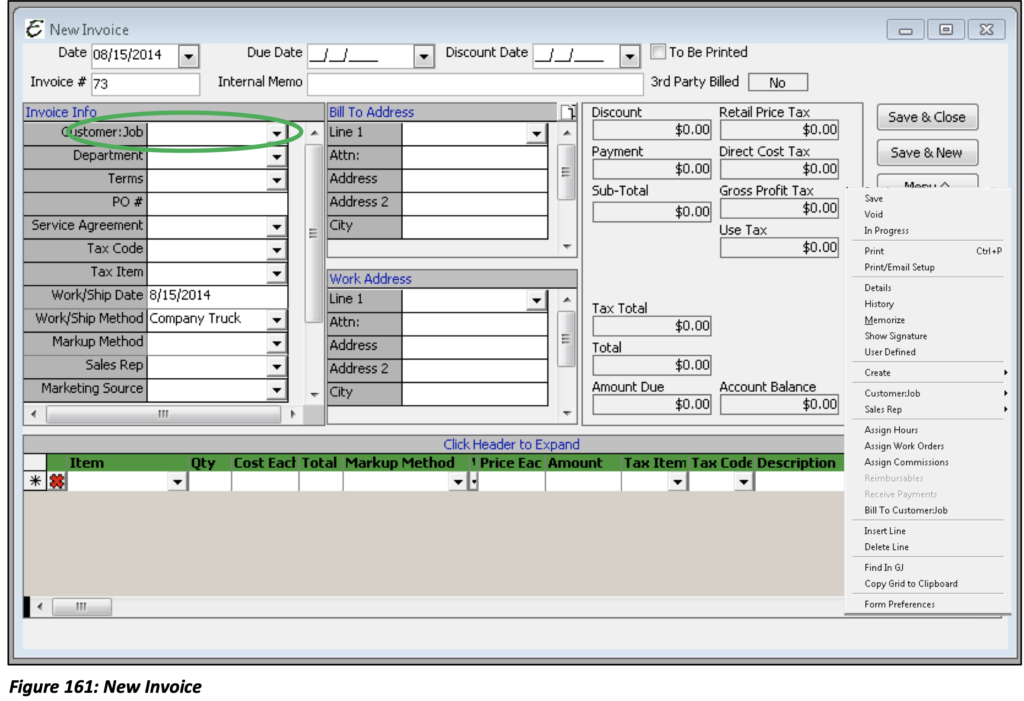
The Invoice form provides great detail for you as it is a very powerful instrument for invoicing your Customers. Once your Customer:Job has been selected from the drop-down menu, the “Bill To Address”, “Work Address”, and “Account Balance “fields will all auto populate based on information you have provided in the initial set up of that particular Customer:Job as well as any previous transactions for that Customer:Job.
Invoice Menu Options
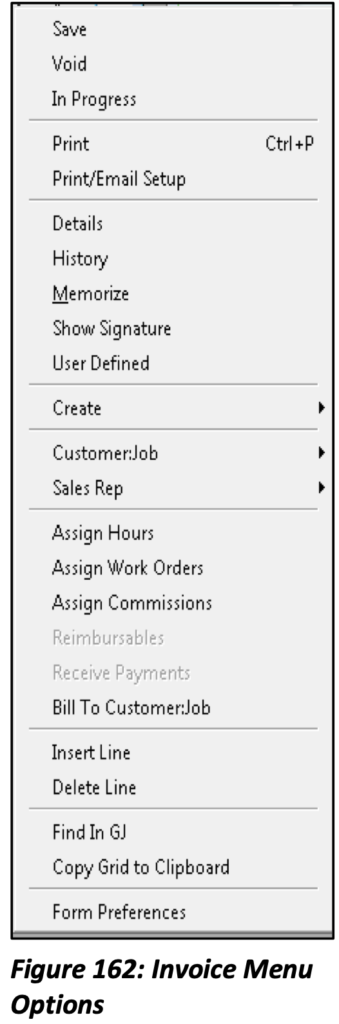
Save: Saves the Invoice but keeps the form open for additional editing.
Void: Voids the entire transaction.
In Progress: Changes the status of the Invoice to “In Progress”. This keeps the Invoice Balance current on the A/R Reports and statements.
Print: Prints the Invoice.
Print/Email Setup: Opens the “Print Preview” and Email options for the Invoice. This is where you can set your Printing Preferences
Details: Opens the notes log for the invoice.
History Displays any transactions that have paid the invoice.
Memorize: This allows you to generate a future copy of the Invoice based off a reminder or auto creation option and schedule. You set the frequency and the software will remind your or create it for you.
Show Signature: Displays the signature captured using the “Signature Capture” feature in Aptora Mobile.
User Defined: Displays a list of all User Defined Fields.
Create: Allows you to create, Credits, Work Orders, and Purchase Orders from your Invoice.
Customer:Job: You may edit the current Customer, view their Contact Log and any Document Links that may exist.
Sales Rep: You may edit the current Sales Rep, view their Contact Log and any Document Links that may exist.
Assign Hours, Work Orders, and Commissions to the invoice.
Bill To Customer:Job: This feature allows you to 3rd Party Bill a different Customer:Job which then transfer all or a portion of that Invoice Balance to the Customer you select.
Insert Line: Inserts a line into the invoice so that additional items can be added.
Delete Line: Deletes a line from the invoice.