Paying Payroll Liabilities
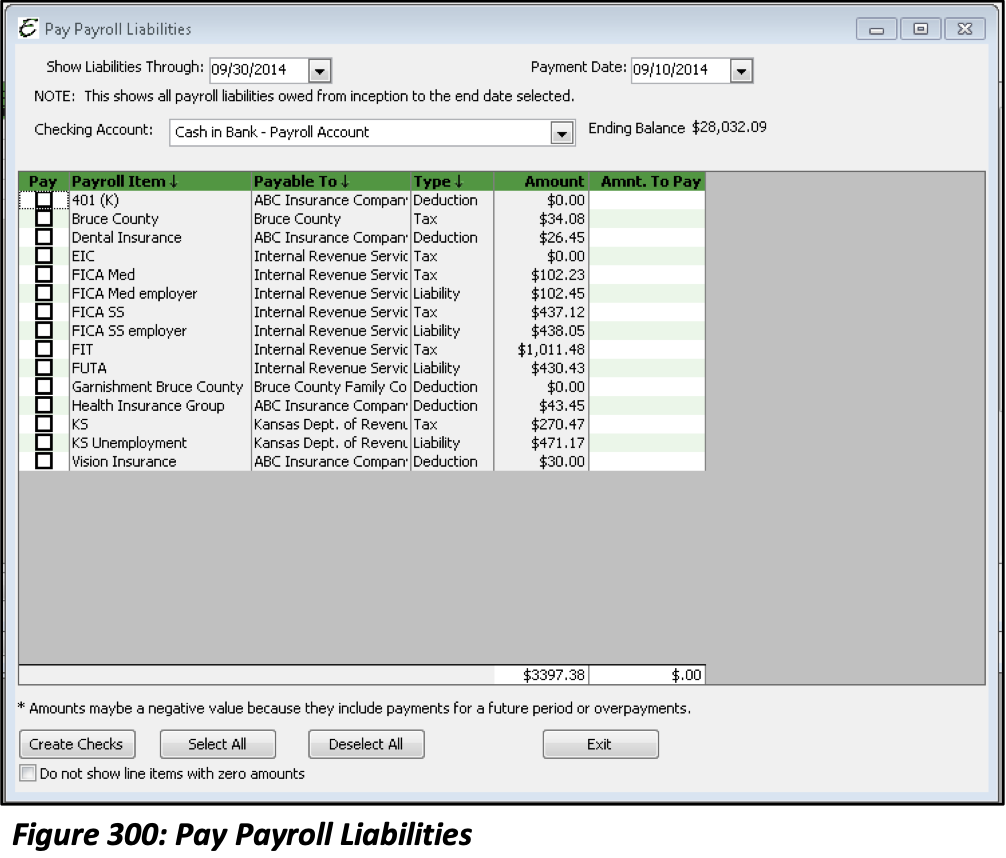
Each time you process a Paycheck, Total Office Manager keeps track of any Liabilities that were calculated on the Payroll Check. This form displays these amounts and allows you to select which ones you wish to pay. A check is created. Once a check is created, these liabilities are removed from your financial reports. To pay your Payroll Liabilities, select Pay Payroll Liabilities from the Employee main Menu option.
Pay Liabilities: Step By Step
- Select the “Show Liabilities Through Date.” This is typically your Paycheck date, the last day of the month for monthly paid Liabilities or the last day of the quarter for quarterly Liabilities.
- Set a payment date.
- Select the account from where the funds will be drawn for payment. This will automatically load if set in preferences.
- Choose the liabilities you wish to pay. Once chosen the full amount will auto populate in the Amount to Pay column. It’s recommended that full amount be paid. but this field can be overwritten.
- Once your selections are complete, click “Create Checks”.
Tips
- Be sure to select the proper “Show Liability Through Date.” This date affects the deposits of Liabilities Payments reflected on the 941 and is most often the cause of a 941 showing a refund for overpayment or a balance due. Your Paycheck Date is the date that Payroll Liabilities are incurred.
- Run the Payroll Summary Report for the Paycheck Date and all Employees. Compare the total for all Employees page to the Liabilities balances for verification before paying Payroll Liabilities.
- Check the option “Do Not Show Items with $0 Amounts” to remove Items without a balance from being displayed.
- Always make Payroll Liability payments through the Pay Payroll Liability form.
Paying Payroll Liabilities: Print Liability Checks
To print the Liability checks that have just been created, access your Check List. Select Check List from the Banking main Menu option.
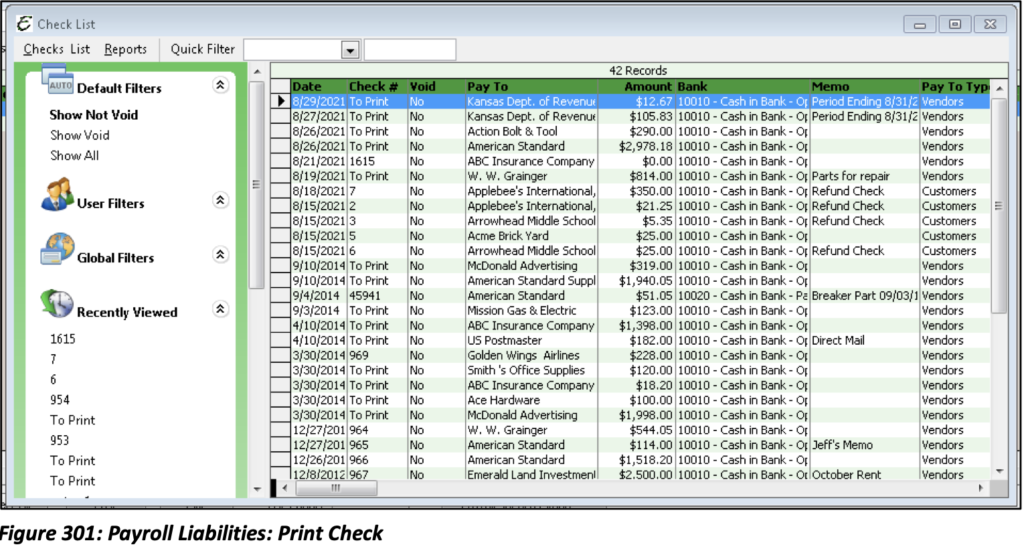
Filter the Check List to display the relevant checks. Select all checks you wish to print and select Print Checks from the Reports Menu option.
Liability Adjustments
After preparing a payroll Tax form, you may discover that your balance for a liability payroll item needs to be increased or decreased. You may make an adjustment due to rounding differences in your payroll feature or maybe because your accountant has advised the adjustment needs to be made.
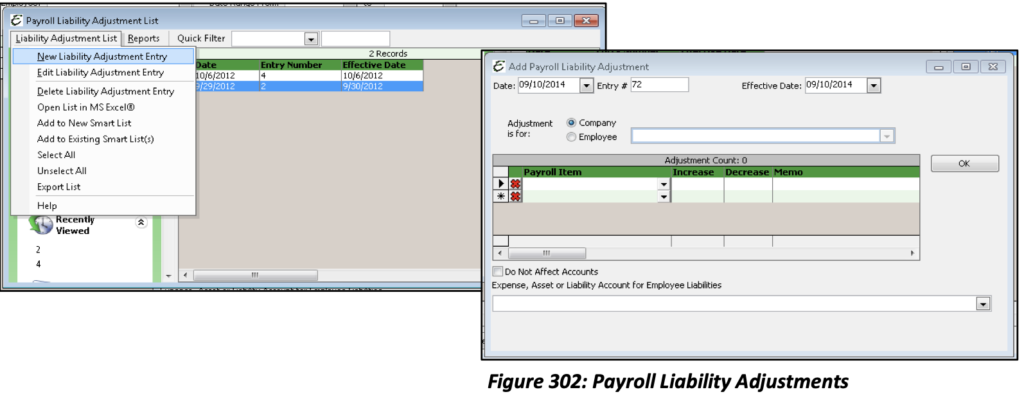
Make Payroll Liability Adjustments: Step By Step
- Open the Employee Payroll Liability Adjustment form. Select Adjust Payroll Liabilities from the Employees main Menu option.
- Select New Liability Adjustment from the Liability Adjustment Menu option.
- In the Date field, enter the date for which you are making the adjustment. (This date affects your Balance Sheet.)
- In the Effective Date field enter the date that you want this adjustment to affect your liability balance. (This date affects you Payroll Item balance.)
- Choose whether to associate this liability adjustment with the company or a specific Employee. For example, if you over accrued Federal Unemployment Tax (FUTA) for an Employee, you can then select that Employee from the drop-down list.
- In the Payroll Item field, choose the payroll item you wish to adjust.
- In the increase or decrease field, enter the amount of the adjustment.
- In the Memo field, enter a note about the adjustment. This is optional, but highly recommended.
- If “Do Not Affect Accounts” is unchecked, you need to select an offsetting adjustment account. This is typically the Expense account assigned to the Liability Item. Do Not select the Payroll Liability Account as this Account will already be affected based off the Payroll Item selected.
Tip: Select “Do Not Affect Accounts” to adjust the Payroll Item balance only. This may need to be done if a check was written against a Payroll Liability Account rather than being created through the Pay Payroll Liability forms.