Receive Items (Without a Bill)

Use this form to receive items before the Vendor has billed you for them (before they send you a bill). When you receive items and get the bill later, first create an item receipt to let Total Office Manager know you have received the items. This way the items will be available for resell and other Total Office Manager users will see that they have been received. To access the Item Receipt screen, select Vendor from the Main Menu, and then select Receive Items.
Item Receipt from an Open Purchase Order

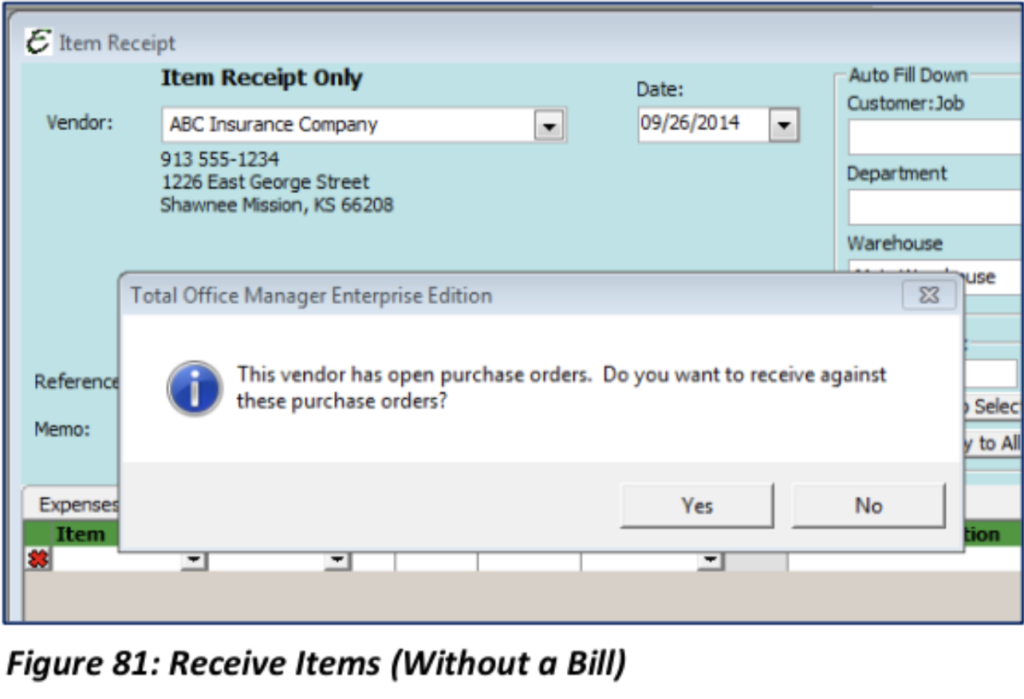
When you select your Vendor on the Item Receipt form, if a Purchase Order is associated with the Vendor, an alert will pop up notifying you the Vendor has open Purchase Orders. Selecting “Yes” will open a PO List.

Select the Purchase Order you would like to use and click “OK”.
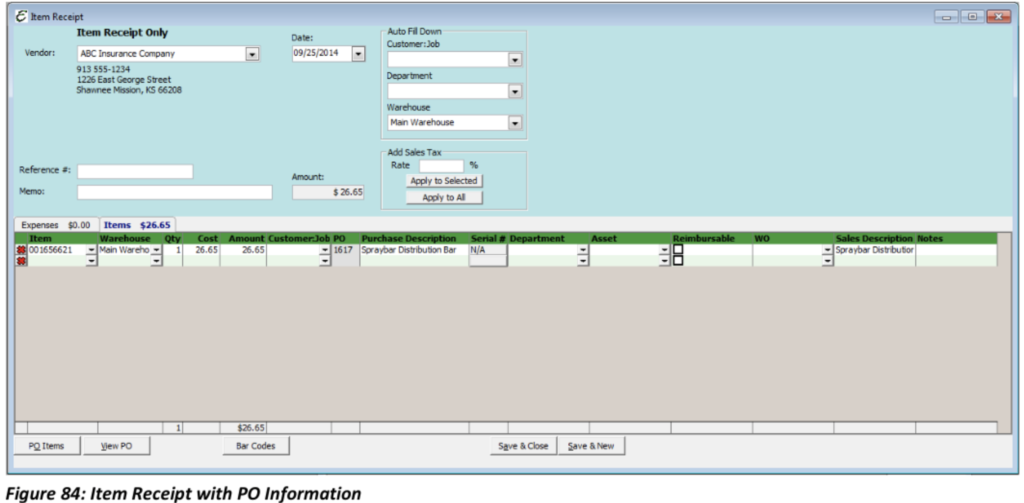
The Purchase Order information will then populate the Item Receipt. You will need to make adjustments as you need to.

Receive Items (And Enter Bill)
Entering a Bill here puts the Bill in Accounts Payable. You will pay the Bill later, when it is due using the Pay Bills form. This allows Total Office Manager to keep track of how much money you owe. In turn, you hang on to your money for as long as possible, improving cash flow. This is the exact same form as Enter Bill, except when opened; the Items Tab has the focus.
Use this form if the items arrive with a Bill. Having the Bill allows you to enter your receipt of the Items and the Bill in a single step. You may be prompted about receiving against a Purchase Order for this Vendor. If there are one or more POs, select the one that pertains to the particular Bill you are entering.
Because you have the Bill for the Items being received, you may also immediately pay the Bill. If you pay for Items as soon as you receive them, you can skip the Accounts Payable process. Instead, use one of the following methods:
By Check: To pay for Items with a Check, select Write Checks from the Banking main Menu option.
With Cash: To pay for Items with Cash, select Write Checks from the Banking main Menu option. Choose your Petty Cash account from the drop-down list in the Bank Account field.
Credit Card: To pay for Items with a Credit Card, select Enter Credit Card Charges from Banking│Manage Credit Cards.
In each situation, when you enter the Vendor name, answer “Yes” when the pop-up messages asks if you would like to receive Items against open POs for the Vendor.
On the Items tab of the Write Checks or Enter Credit Card Charges windows, adjust the quantity received, or delete the line item entry if necessary.
Enter CC Charge for Received Items
Credit Card Charges are entered for purchases you make when those purchases are paid for by a Credit Card. To enter a Credit Card Charge, select Manage Credit Cards from the Banking main Menu option, then select Enter Credit Card Charge.
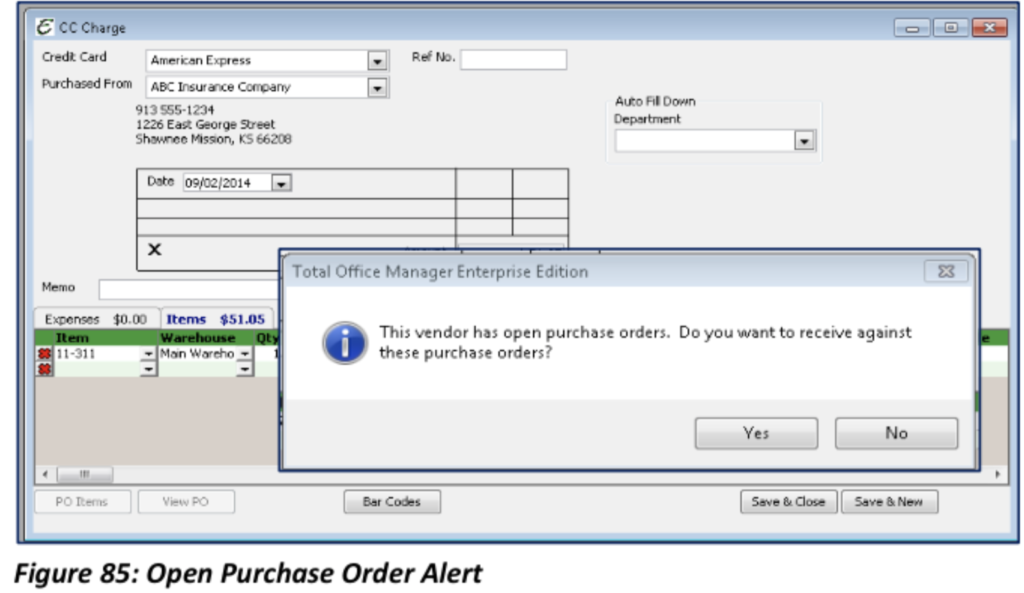
A blank form will open, and you must choose the Credit Card that will be used to make this payment. You will also need to select the Vendor to whom the payment is being made. If the Vendor has open POs, you will be asked if you would like to receive against them. The “Yes” option should be chosen since you have paid for the purchase of Items received by Credit Card.

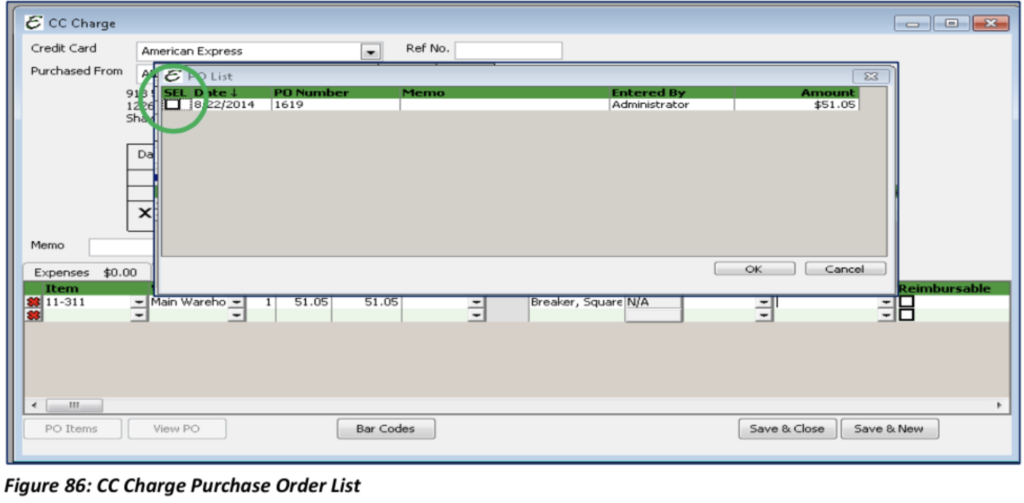
A list of open POs will open. Select the Purchase Order to which the Credit Card Charge is being applied. The Items associated with the selected Purchase Order will populate in the CC Charge form. If any changes need to be made (Qty, Price, Reimb, Department) they can be made now. Once the CC Charge is final; select Save & Close.

Lesson 2 Homework
Using your training database, create two different “Inventory” type parts. Enter an item that your company sells, such as motor and capacitor. Create a “Serialized” type item. Again, make this item something you sell such as a furnace. Create a purchase order using ten each of those parts. Using the Receive Items form, receive 100% of your PO. Now, open the Enter Bill for Received Items form and enter your bill. Check your income statement and balance sheet. What changes can you see?

