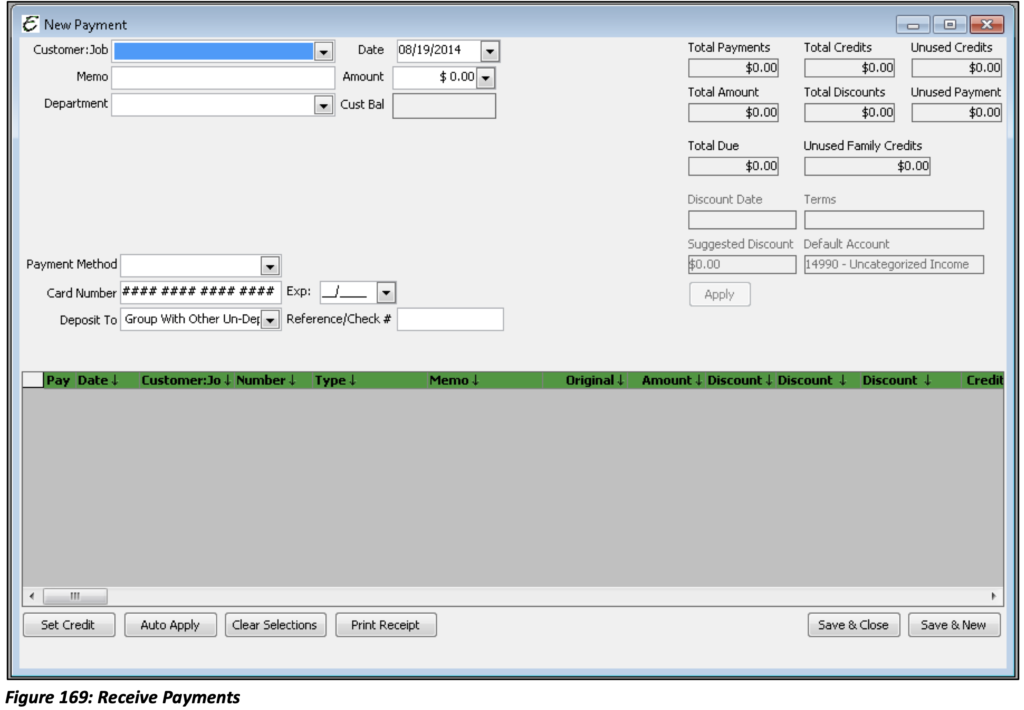
Once a Customer has made a payment on an Invoice, select Receive Payment from the Customers Menu. From the Customer:Job drop-down select the Customer from whom you are receiving payment and a list of invoices will appear. Enter the amount to be paid. Select which Invoice(s) are being paid, the payment method (cash, check, credit card or money order), and the account to which the funds will be deposited.
Please note: In order for the payments to be correctly applied, an amount must be entered before selecting an Invoice.
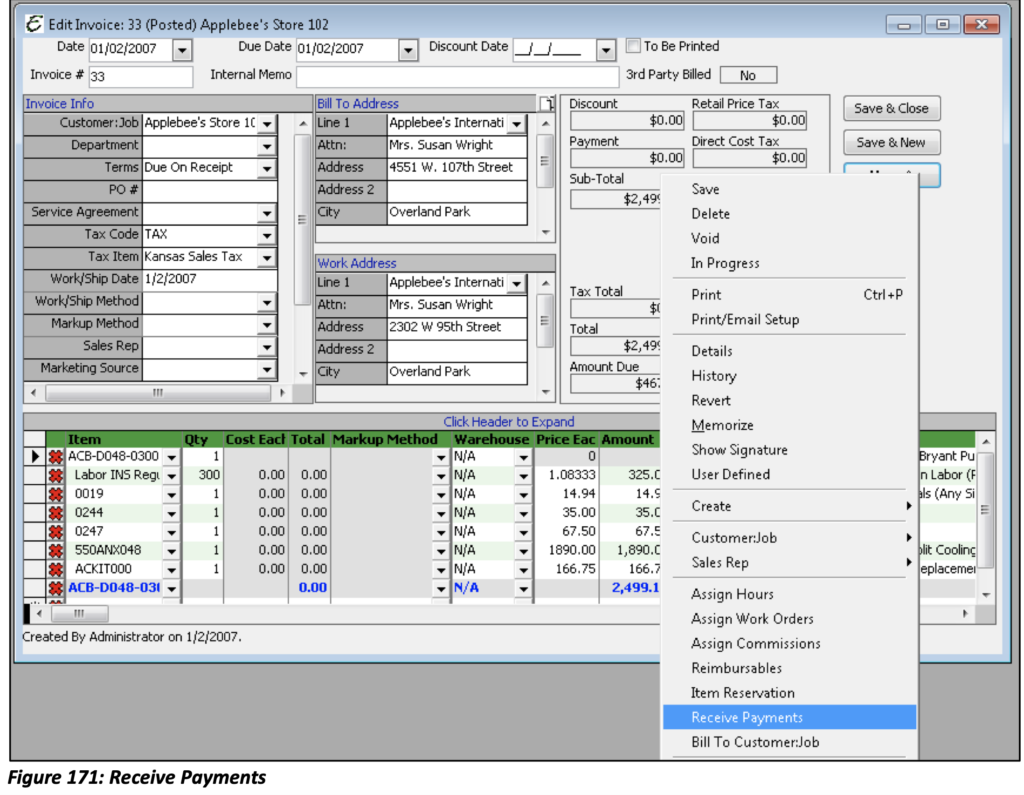
Payments can also be received directly from the Invoice being paid. This will bring up the Receive Payment form (above), and the Customer:Job will already be selected. It will also populate the amount of the Invoice due. If the Customer:Job that you selected has any Sub:Jobs (children), a list of their Invoices will also appear. From the Menu option on the right-hand side of the form select Receive Payments.
Please note: Payments can be made to child or sub accounts, but sub or child accounts cannot make payments to their parent’s account.
Payments can be received and deposited directly into an account of your choosing. If you plan to receive multiple payments and deposit them all at once a later date, the account “Un-deposited Funds” may be selected.
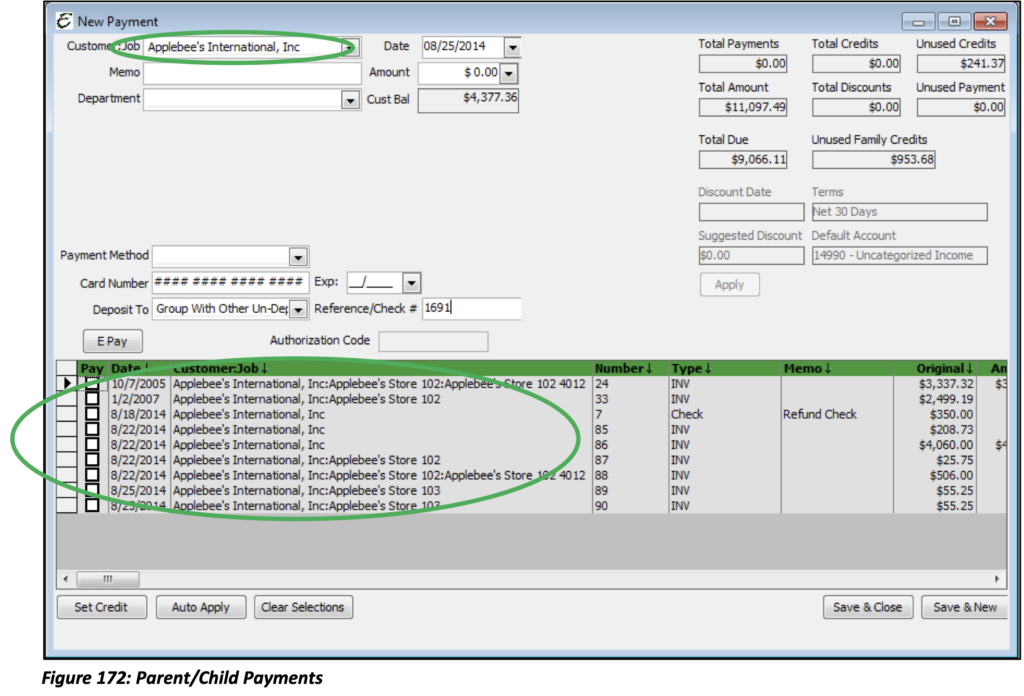
Receiving Payments for Parent/Child Accounts
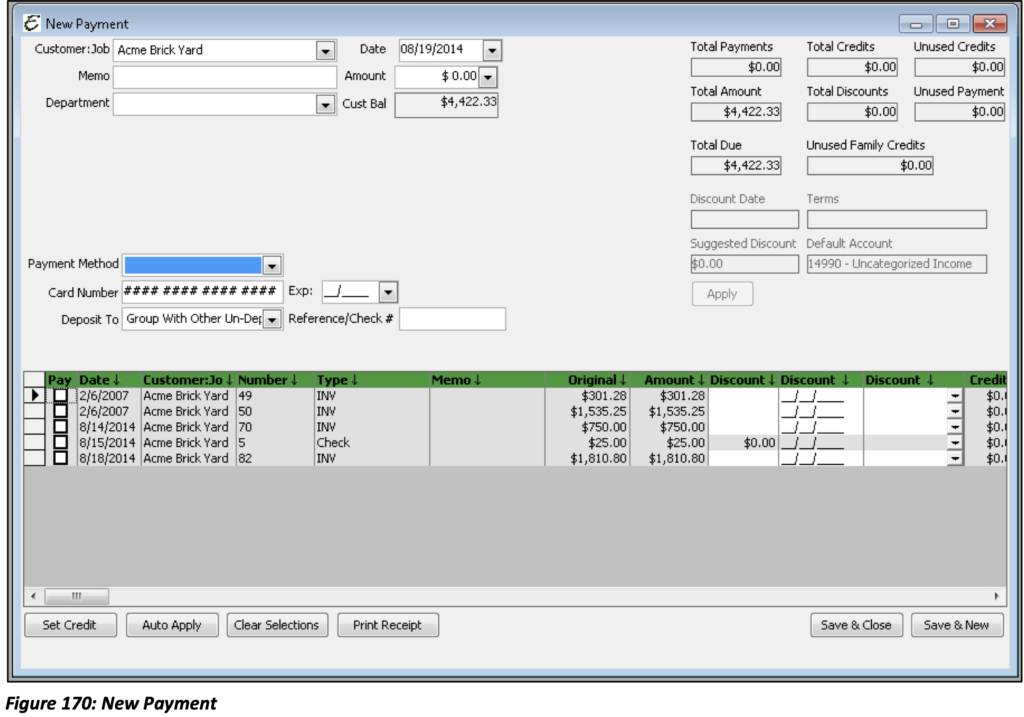
When receiving payments from a Parent Account that involves the Parent and Children, you will need to apply the payment through the Parent Account. When you pull up the Parent Account in New Payments, you see invoices for the Parent, Child(ren) and Grandchild(ren) Accounts. Select the invoices that are being paid, and then select Save & Close or Save & New.
Payments that are received by the Child Account should only be applied to that particular Child Account.
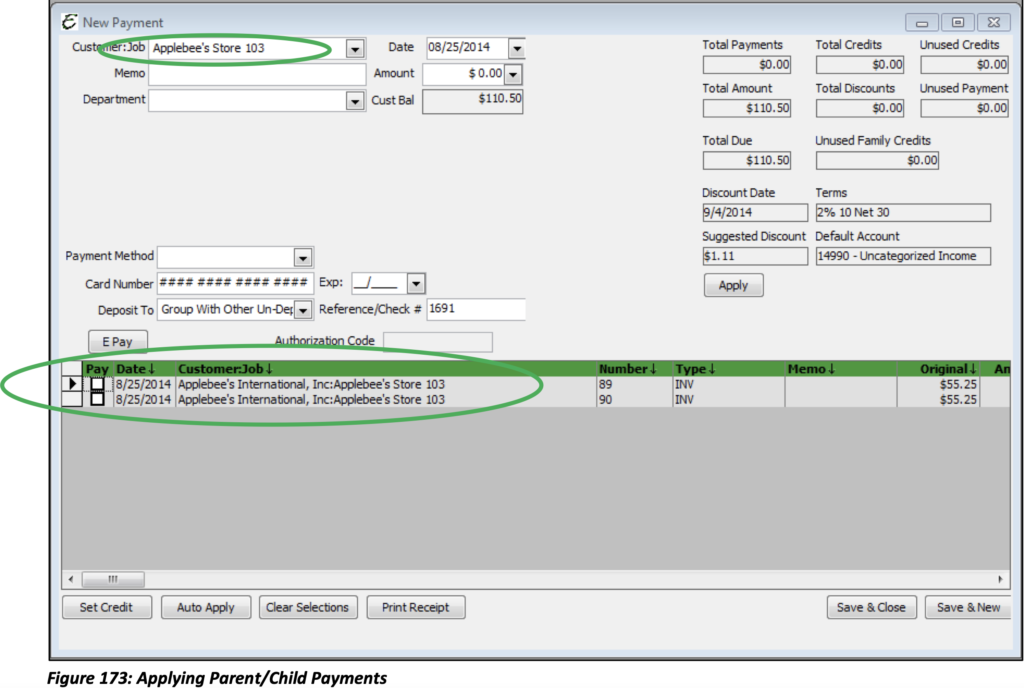
Please note: Should you receive a payment from a Child Account for other Child Accounts of the same Parent, you will need to apply the payment through the Parent Account or split the payment out for each Sub-Job.
Making Deposits
There are two types of Deposit to Accounts: Group with Other Un-deposited Funds and Bank Accounts.
Group with Other Un-deposited Funds : When using this option Total Office Manager will hold all of the payments you have received from customers in a special account (created automatically by Total Office Manager) called Undeposited Funds. To move these payments from this special account to your bank account, you must use the Make Deposits feature. This method is recommended if you typically hold the money you have collected from customers and deposit them as a group or deposit two or more payments in one lump sum.
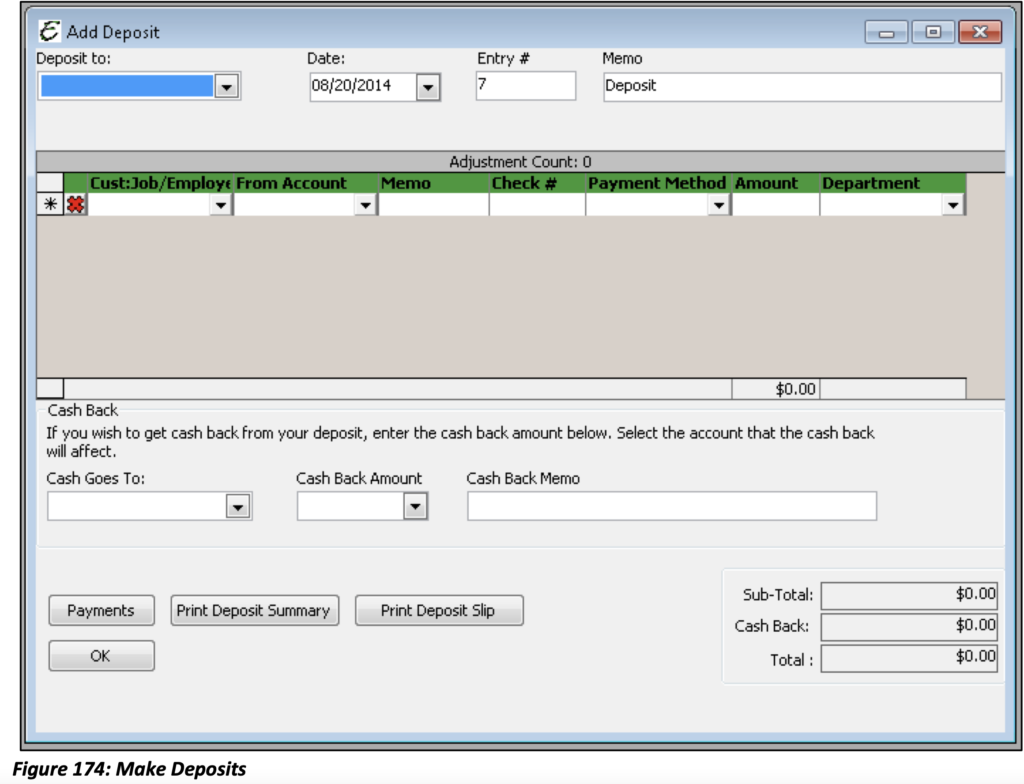
From the Banking Menu option select Make Deposits. (Ctrl+D) The below form will open. If you have received payments to the Undeposited Funds account another window will pop up notifying you that “you have un–deposited funds that need your attention”.
Please note: You may also use your toolbar to quickly access the Make Deposits Function. The icon for Make Deposits is the piggy bank.
To view this list of Un-deposited Funds, select Payments. Select the payments you wish to deposit then click close. Once you have selected the payments they will be listed on the Add Deposits form.

If you have multiple payments with multiple payment types it is recommended that each type be deposited as such and separately from each other. For example, if there are 15 payments listed and 4 of them are cash, 6 are check and 5 are credit card payments, then there would be three different deposits for each type. You may also choose to deposit Cred Card Payments of the same type together such as all American Express Payments in one deposit and all Visa Payments in another.
The Add Deposit form has now been populated with the payments that you have selected.
Select the account to which the payments will be deposited Each field starting with Cust:Job/Employee will be auto-populated according to the information provided when the initial Payment was made. When payments from Undeposited Funds are selected, the Customer:Job/Employee and Account fields cannot be modified.
The Add Deposit form also gives you an option called Cash Back. This allows you to move a portion of the deposited funds to a different account or reduce the overall deposit amount. This is frequently used to account for Merchant Fees or other reductions within a Deposit.
Deposit To “Bank” Account: This method will cause Total Office Manager to deposit all payments into your bank account as they are recorded. In other words, the money is immediately moved to your bank account. The payment does not go into the Undeposited Funds account and you do NOT use the Make Deposits feature in Total Office Manager.
Please note: This method is recommended if you make your deposits one at a time. More simply, you either deposit your checks one at a time or you use a separate deposit slip for each check.
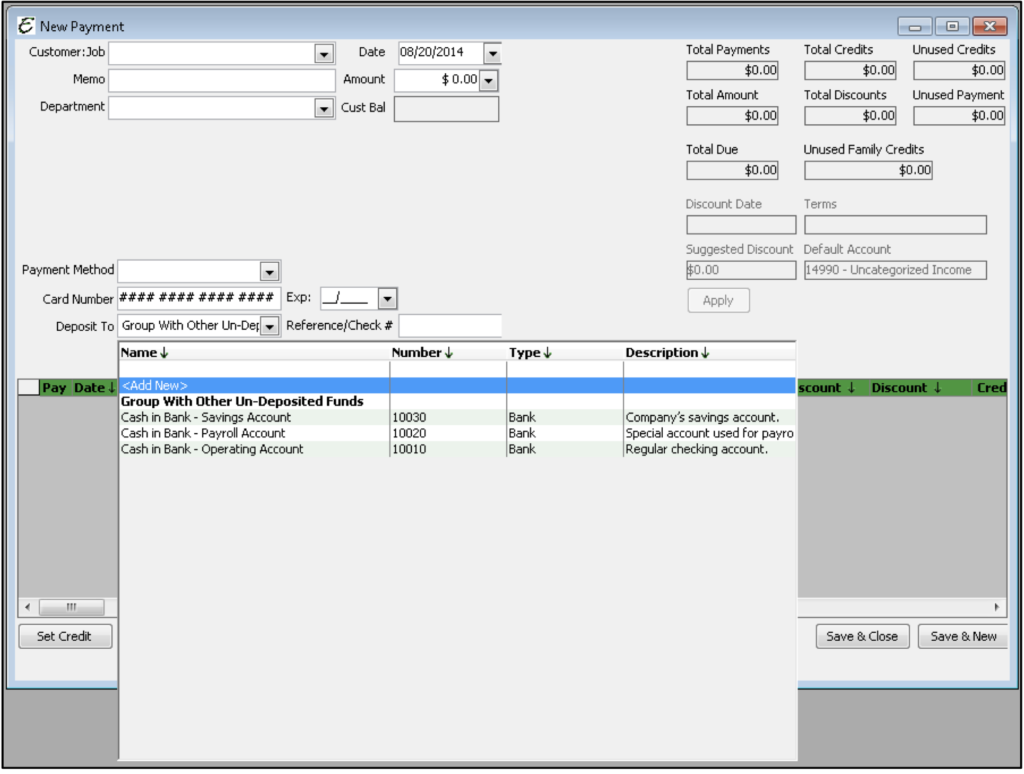
When entering a new payment, from the Deposit To drop-down select the specific bank account into which the funds will be deposited instead of choosing the “Group with Other Un-Deposited Funds” account.