Customer credits are used to issue a credit as a result of a refund or other reasons. Example: A customer complains about an overcharge on an invoice. (too many parts invoiced, not satisfied with work performed etc.) A credit for items returned can be issued to the Customer. Later you can apply that credit towards money they owe you or you can write a refund check from the credit memo.
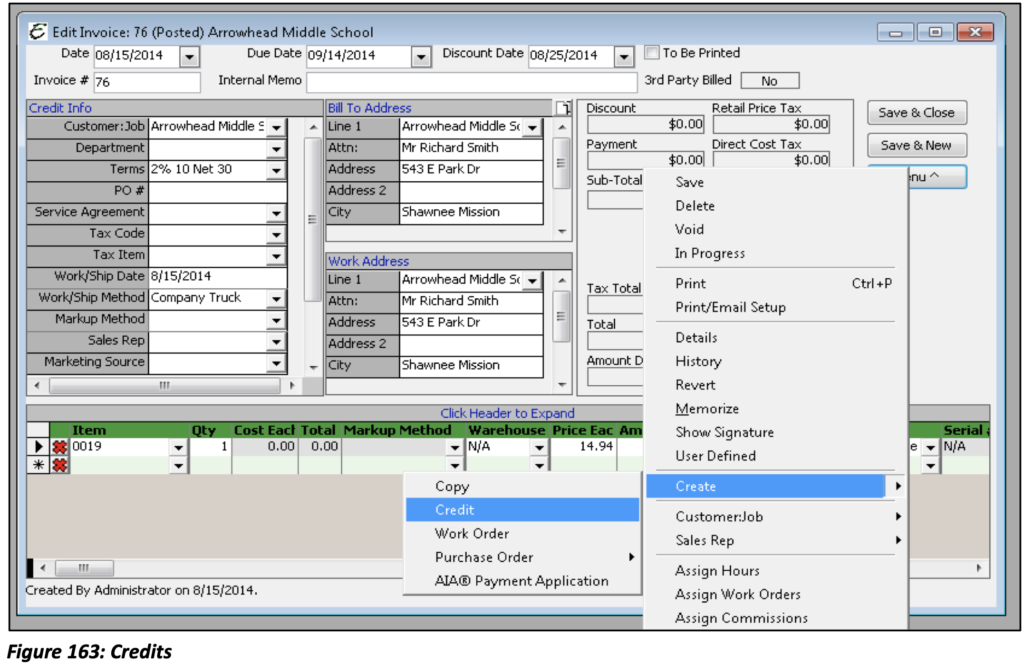
Creating Credits works almost exactly like creating Invoices or entering Sales. Once the credit form is completed the balance of that customer’s A/R will decrease by the amount of that Credit once applied. Once a Customer requests a credit or refund for work done or products delivered, select that particular Invoice and from the Menu drop-down on the right-hand side, choose Create│Credit.
To access a new Credit Memo, select Customers, from the Menu bar and then select Create Credit Memos/Refunds.
Applying Credits
Once a Credit has been created, it can be applied to an existing invoice for the Customer. To apply a credit, you must create a new payment.
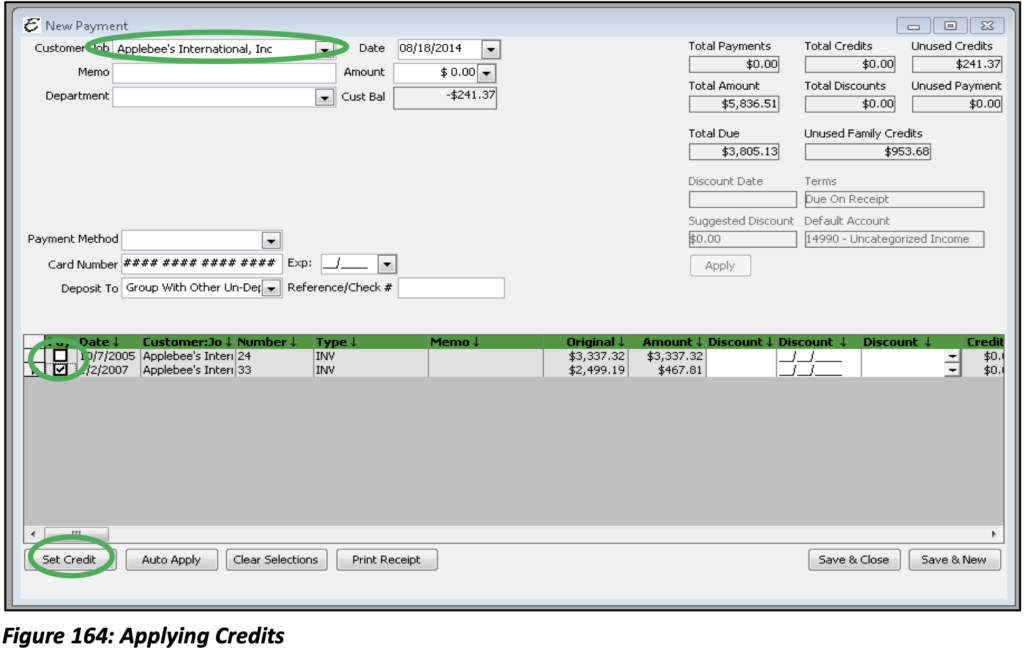
Choose the Customer:Job for whom you have just created the Credit and a list of outstanding invoices will be displayed. Select which invoice you would like to apply the Credit to and then click Set Credit from the bottom left corner of the form.
How Credits Work
The below form will appear once you have selected the Set Credit option.
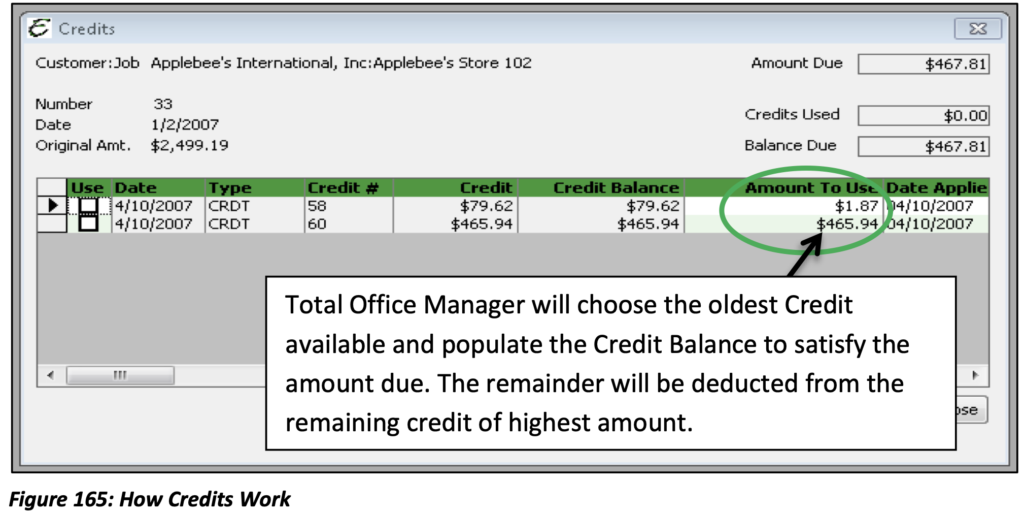
Amount Due: The total amount of the invoice.
Credits Used: Amount of Credits to use on this invoice.
Balance Due: The balance due after the Credits have been applied.
The total amount due is $467.81. There are two credits available for this Customer that total more than the amount of the invoice. Total Office Manager will assign the oldest credit first; if that does not cover the total of the invoice the remainder will be taken from the next credit. You may choose to apply both or just one. If this invoice is going to be paid using all available credits there would still be a Credit Balance for this Customer:Job of $77.75.
Tip: In Version 10.0.0 (or higher), there is a preference that will stop the automatic application of Credits (amount to use field will be left empty). This can be found under Edit│Preferences│Customer:Jobs│Company Preferences│Do Not Auto Suggest Credit Application When Receiving Payments.
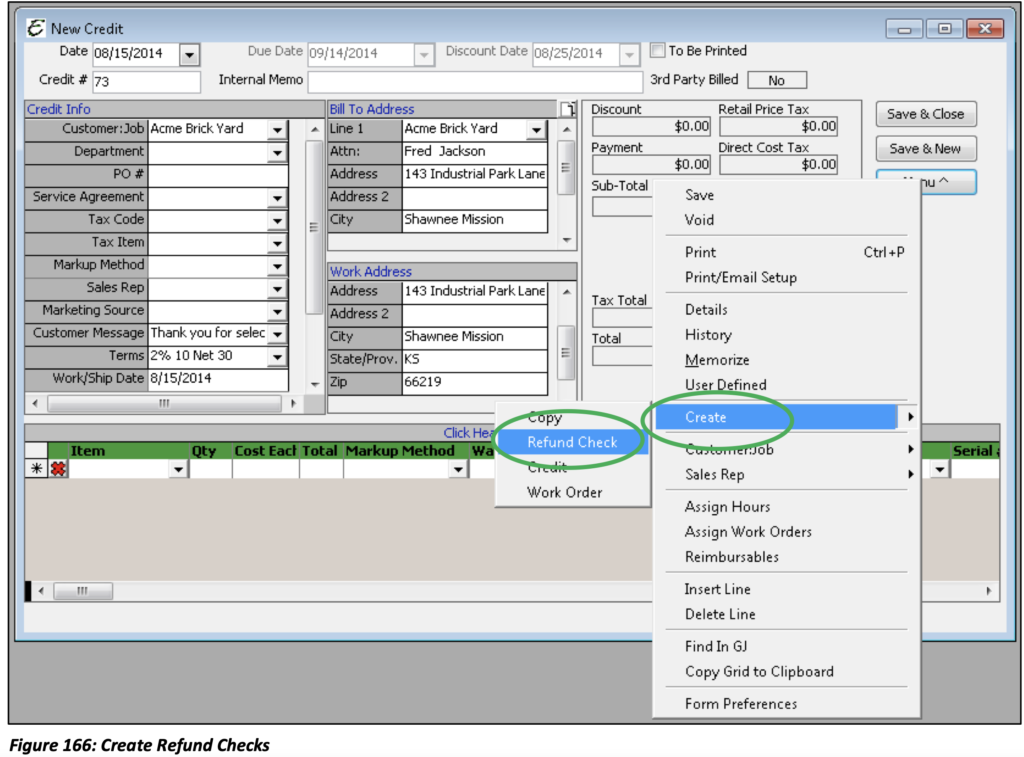
To generate a Refund Check, select Create, Refund Check, from the Menu drop-down on the right-hand side of the Credit Memo form.
Once your Refund Check has been created the following image will appear.

The account from which you will be drawing the funds to pay the refund will need to be selected. The check will also need to be given a check unless you wish to print it later. All information pertaining to the Customer:Job will auto-populate, and the corresponding A/R account will need to be selected.
A Refund Check can also be generated from the Banking, Write Checks Menu option. This opens a blank check form that can be populated with the Customer’s information and the amount to be refunded will need to be refunded.
Please note: Refund checks are most commonly created when a Customer has overpaid on an Invoice or submitted more payment the balance of their account.
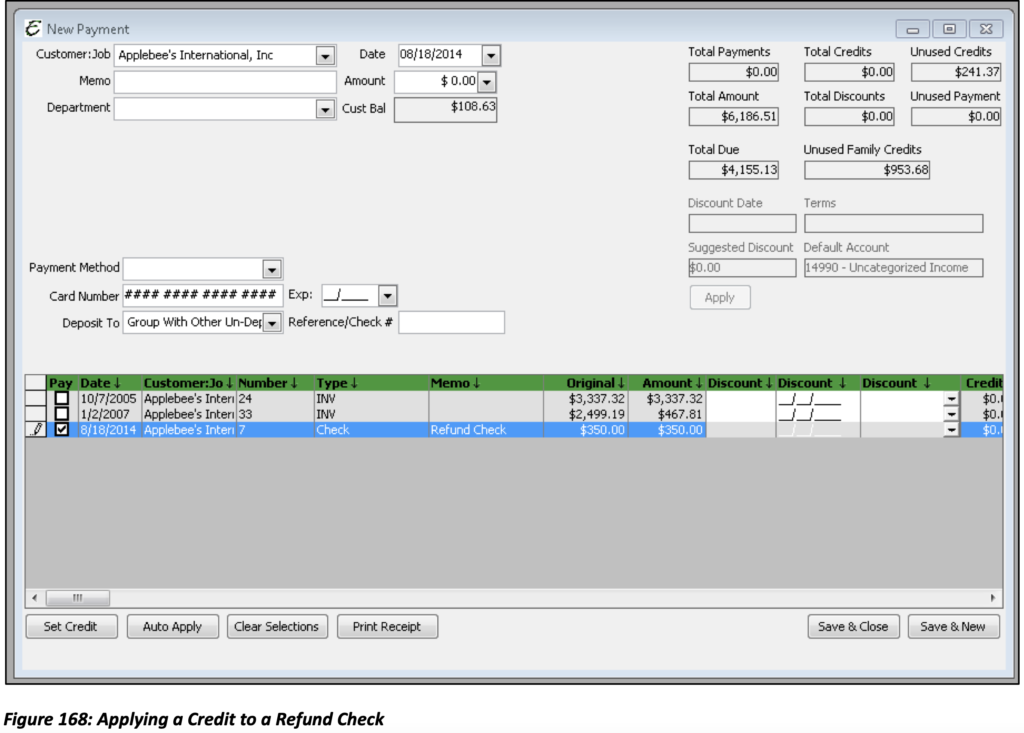
Applying a Credit to a Refund Check
When Refund Checks are written, they appear in the Payments list along with any outstanding invoices, allowing Credits to be applied to them as well. In the same way that Credits are applied to Invoices they can be applied to Refund Checks.