Item Types were covered earlier in this training system. It is being covered again incase attendees were not part of that training. Please feel free to inform the trainer that you wish to skip this section if you do not feel that you need the review.
Invoice Item Types
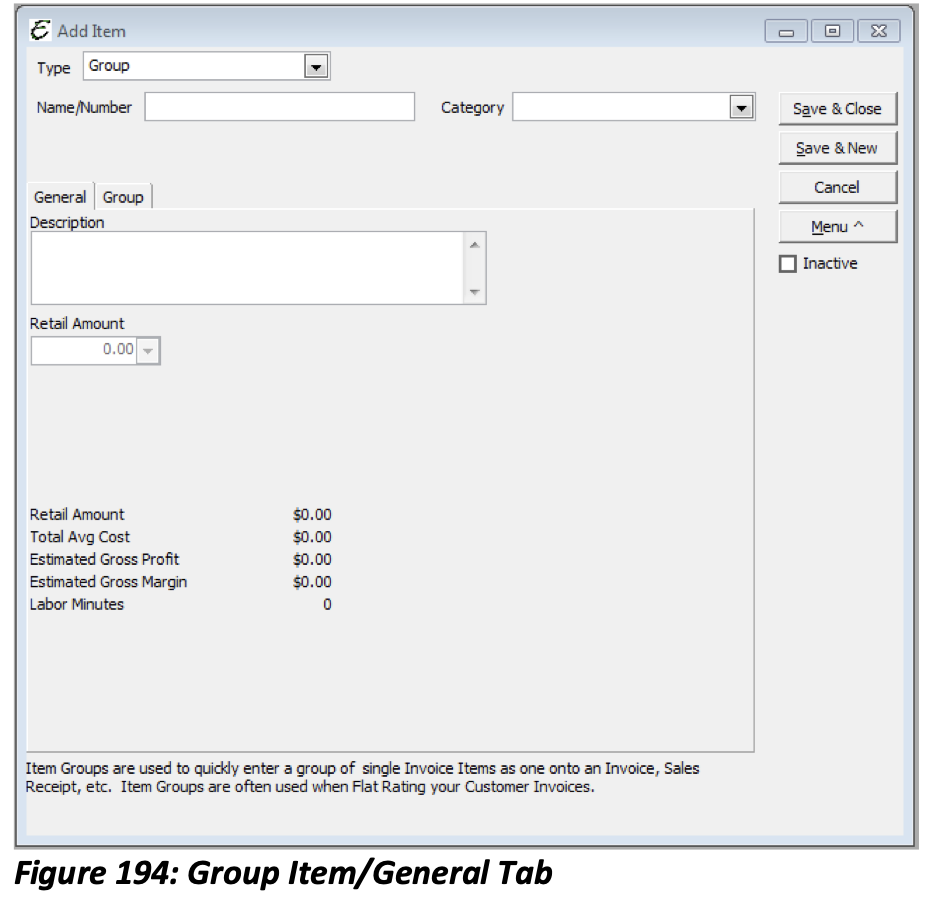
Discount Item
A Discount Item applies a discount (either a percentage or a fixed amount) to the preceding line on a sales form. Discounts subtract a percentage of fixed amount from a total or subtotal. Do no use this item type for early payment discount.
Tip: Create a Discount Item for each discount you offer, for example, Military, Senior Citizen, etc. Each Service Agreement Item automatically creates its own discount item. This will give you more detailed history and reporting.
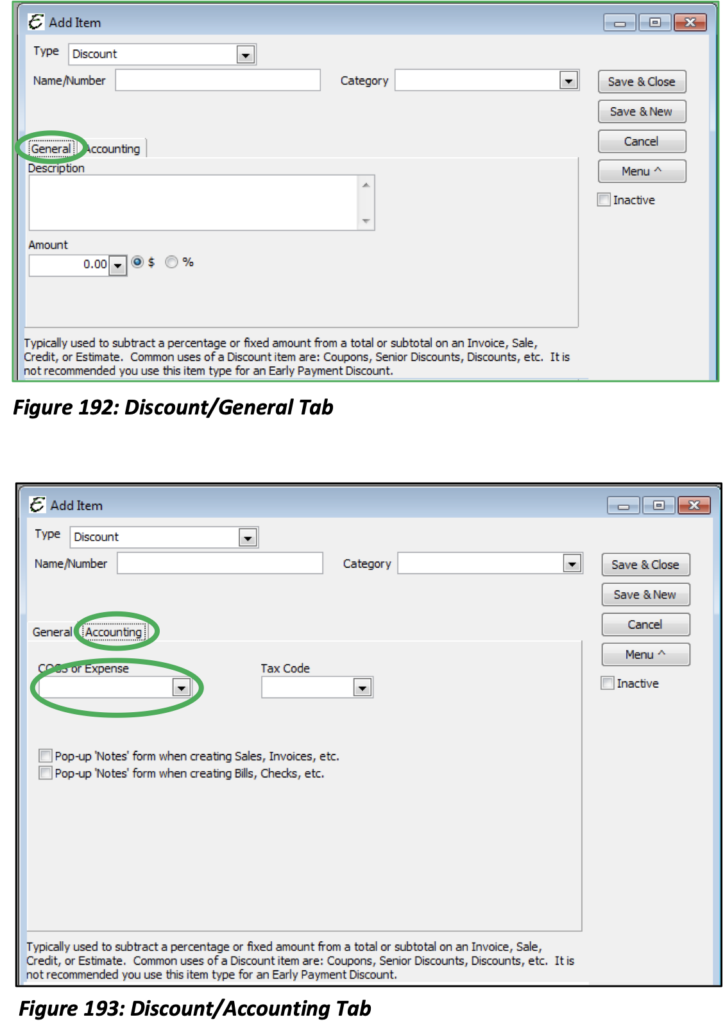
Type: Discount
Name/Number: Give the Discount Item a name or number that will be used to identify it when adding to sales forms.
Category: If this item belongs in a category, one may be chosen.
General Tab: On this tab you may enter an optional but recommended description of the Discount Item. Select whether it will be a fixed amount or percentage discount then enter the appropriate figure in the Amount field.
On the Accounting Tab select the COGS/Expense account that will be used to track this item.
The Tax Code can also be selected. Although the default is set on creation it can be changed once added to other various forms throughout Total Office Manager.
You may also elect to have pop up notes when creating Sales, Invoices, Bills, or Checks.
Tips on Using Discounts
- We are often asked about how-to setup and manage discounts. The question about discounts is an age-old accounting question. It doesn’t have anything to do with accounting software but has a lot to do with how you want your reports to reflect discount activity.
- If you write up an invoice for $5,000 and offer it to a client but ultimately accept $4,000 for that sale, what the sale $5k or $4k? For me the answer is “it depends on why the discount was offered”.
- If the discount was the result of a “Pre-Season Sales Event” (or some other planned discount event), We might call it COGS at that COGS account might be called “Promotions”. This event erodes or gross profit margin. The Income Statement will make the impact clear to the reader.
- If the discount was the result of a lower negotiated price (during the normal course of selling things to people), then we would use a Discount item that has an Income account associated with it. That would reduce income and we would never see that discount on our Income Statement. That’s fine because in the case is wasn’t a $5,000 sale reduced to $4,000. It was a $4,000 sale all along. We could just lower the retail price of the item(s) but the Discount item will show the buyer they got a great deal.
- If the discount was the result of a client who complained about our service, even though we disagree with them, we might call it an Expense and that Expense account might be called “Discounts for Public Relations”. In this case, the discount is overhead. It was not planned.
- We also recommend discount items for “Callbacks” and “Warranty” work. We would select an Expense account because we consider it overhead. The Income Statement will clearly indicate the cost of callbacks and warranty work.
- Keep in mind, you pay income taxes on net income and not gross income. So, it is just a matter of reporting.
Group Item
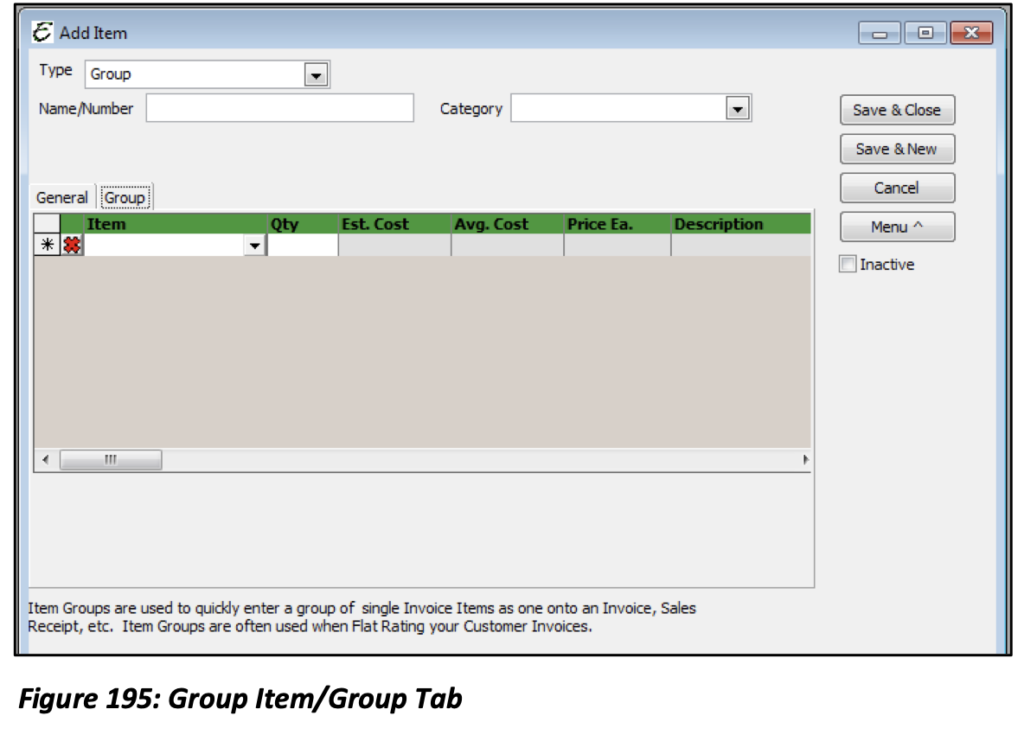
If on sales or invoices you often enter the same collection of item repeatedly, consider setting up these items as a single group item. Then, instead of entering each item individually, simply pick the group item. The components in the group will automatically be itemized on the sale or invoice.
Give the Group Item a Name/Number and a category if one exists for it. In the Description box, provide detail for the Group.
Retail Amount: Is the cumulative retail amounts of each item in the group. This field cannot be edited and will be auto populated once you add items to the Group Tab.
Retail Amount, Total Avg Cost, Estimated Gross Profit, Estimated Gross Margin, and Labor Minutes are also auto populated when items are added to the Group.
From the Item drop-down list on the Group Tab, select each Item that will be a part of the Group you are creating.
Tip: Group Items are often used to create Flat Rate tasks.
Inventory Parts
Inventory Parts are items you buy, track as inventory and then resell. Through inventory items, you can keep track of how many items remain in stock after a sale, how many items you have on order, your cost of goods sold, and the value of your inventory.
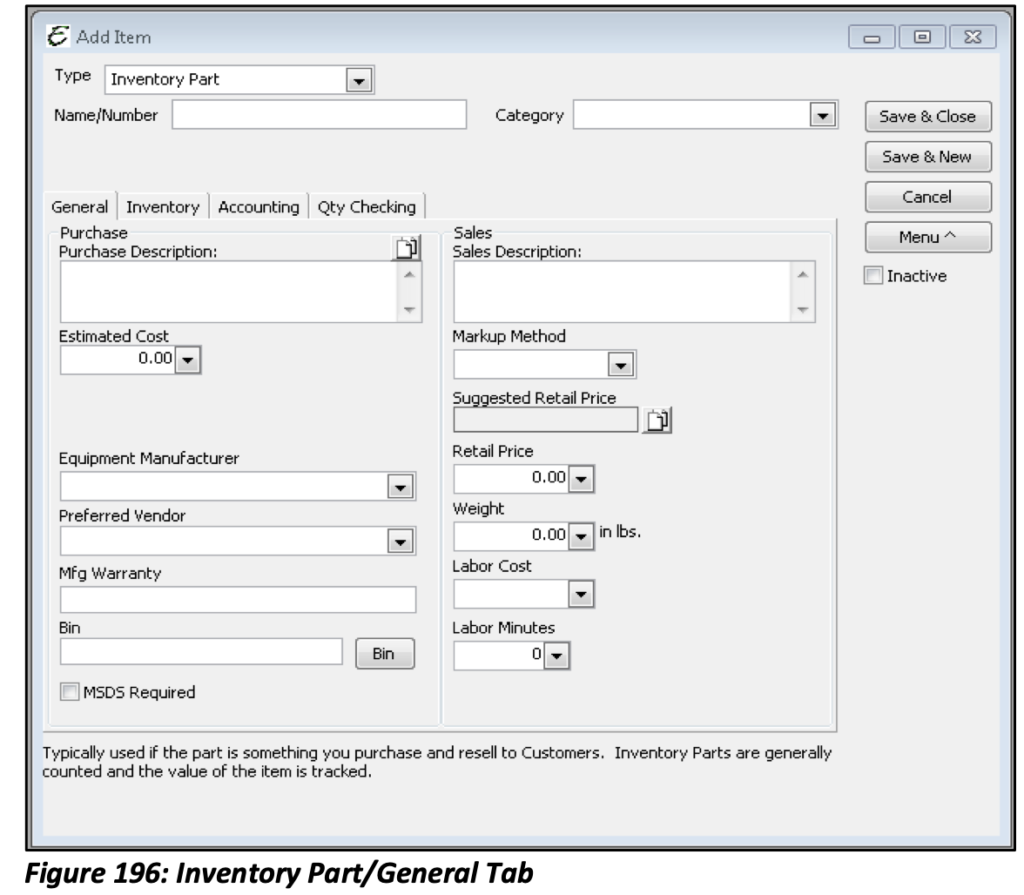
Purchase Description: An item explanation which is used internally when purchasing and replenishing inventory. This description probably contains more industry specs and detail then the sales description.
Sales Description: An item explanation which appears on sales receipts and invoices. Customers will potentially see this description.
Estimated Cost: Used to record the expected purchase price of the item.
Preferred Vendor: If applicable, choose the favored Vendor from which to purchase this item.
Mfg. Warranty: A short field used to jot down basic manufacturer warranty info.
Bin: Used to record in which bin a part might be stored. For example, small, blue 16-guage widgets might be stored in bin G-23. The “Bin” button opens the Item Bins form which is used to record this same sort of bin info for multiple warehouses.
MSDS Required: Checking this option indicates that a Material Safety Data Sheet for this item needs to be kept available on file.
Markup Method: After setting up your Price Level List and your Inventory Markup Table List, select the means used to markup the inventory part here. The results of the chosen markup method will be proposed in the Suggested Retail Price Field. Clicking the ‘Suggested Retail Price’ button accepts the calculation and copies the suggested price into the Retail Price field.
Retail Price: Enter the actual price to charge for the item. This may be the same as the Suggested Retail Price, or it may be manually entered as any desired amount. If this price fluctuates by Customer, you may also choose to leave it blank.
Weight: If known, used to record the weight of the item. Useful for calculating freight if larger volumes are warehoused.
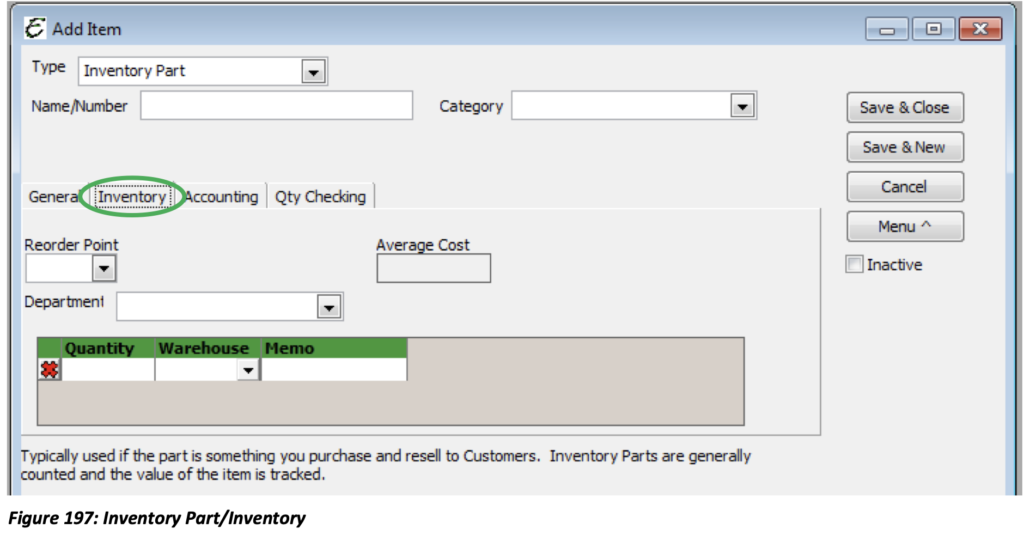
Reorder Point: Point at which an inventory part hits a certain quantity and needs to be ordered. Department: If the item is typically used in one department rather than another, select the department from the drop-down list.
Quantity/Warehouse: When setting up a new inventory item for the first time, existing inventory counts can be directly entered into the Inventory Tab using the Quantity/Warehouse field. Enter the number of items on hand in the Quantity Field and then choose the Warehouse where these items will be stored.
Average Cost: Displays the calculated average cost paid for the item.
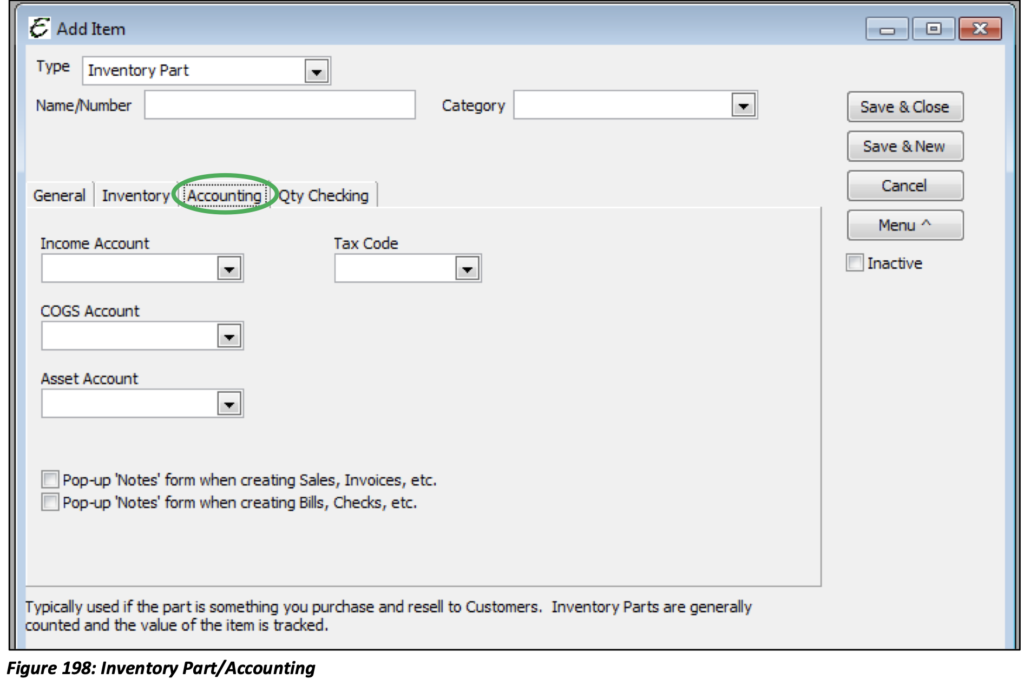
Income Account: Based on your accountant’s recommendation, choose which of your income accounts to use when a sale of the item occurs.
COGS Account: Based on your accountant’s recommendation, choose which of your COGS or Expense accounts to use when a purchase of the item occurs.
Asset Account: Based on your accountant’s recommendation, choose which of your asset accounts to use when you receive into your possession delivery of this item. Many companies use an asset account called “Inventory”.
Tax Code: Used to set a default tax code for a particular item. This is not a mandatory field.
Tip: Total Office Manager restricts the types of accounts that are available for selection. This is done to make selection easier and prevent an incorrect selection. Your Administrator can give you full access to the Chart of Accounts List by going to Edit│Preferences│Chart of Accounts│My Preferences│Smart Account Selection Filtering.
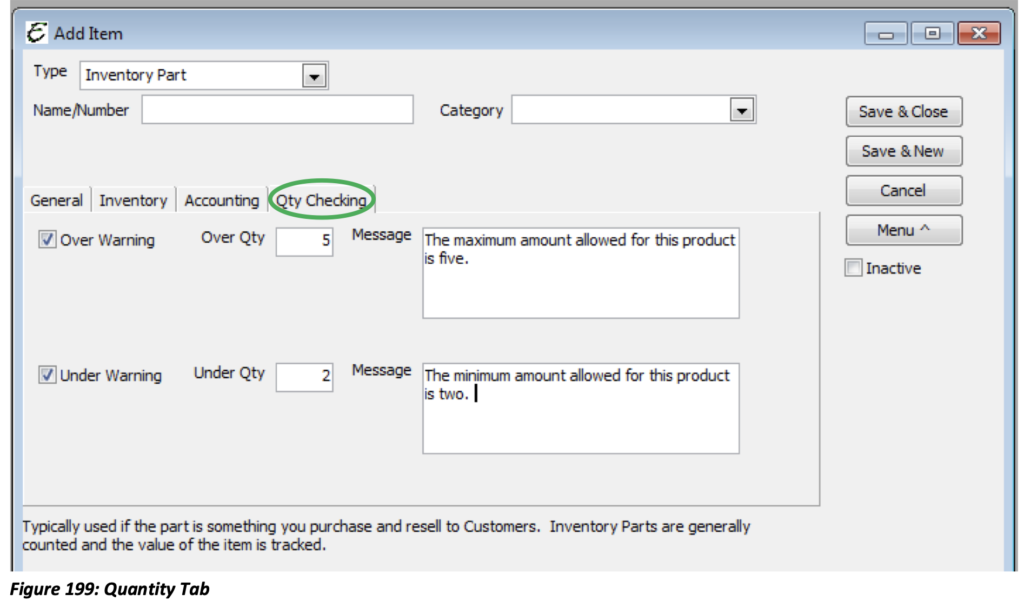
Qty Checking Tab: This gives you the option to set a minimum and/or maximum quantity by item. Once an item is selected, if the item quantity is over or under the assigned number, the message provided will appear to the user. This is important when items such as Freon are used. If you go over a maximum quantity of Freon, then the message will appear indicating that a service inspection to locate a leak is required.
Non-Inventory Parts
Non-Inventory Parts are items you don’t track in inventory. (i.e. Items purchased for a specific job and then quickly sold or invoiced to the customer, items you sell but do not purchase, items you purchase but do not resell (office supplies), items you purchase and resell but do not track as inventory).
When you set up Non-Inventory Items, you choose a single income account that tracks both purchases and sales of the item. When you purchase an item, the cost is subtracted from that income account. When you sell an item, the proceeds are added to that income account. In this way gross profits can be tracked.
It is possible to track COGS or expenses separately by using the “This item is purchased for and sold to a specific Customer” check box.
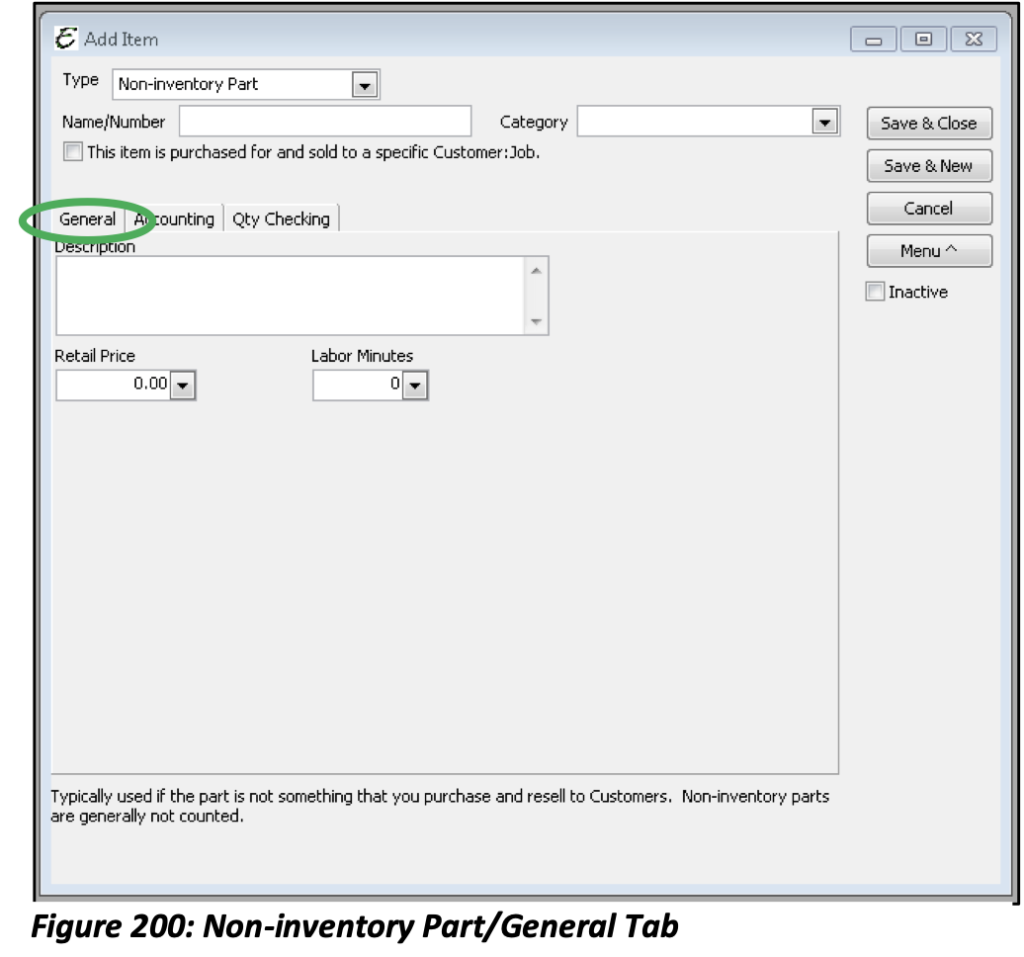
Complete the fields in the General Tab. Here it is assumed that the “This Item is purchased for and sold to a specific Customer” check box is not selected. When selected, the General Tab becomes identical to an Inventory Part.
Description: An item explanation. Customers will potentially see this description.
Retail Price: Enter the Retail Price charged to the Customers when the item is sold.
The Accounting Tab allows you to select an Income Account used to track both purchase costs and sales revenue for the item. Although optional, you may also choose a default Tax Code for this particular item.
The Qty Checking Tab is identical to the Inventory Part.
Other Charge
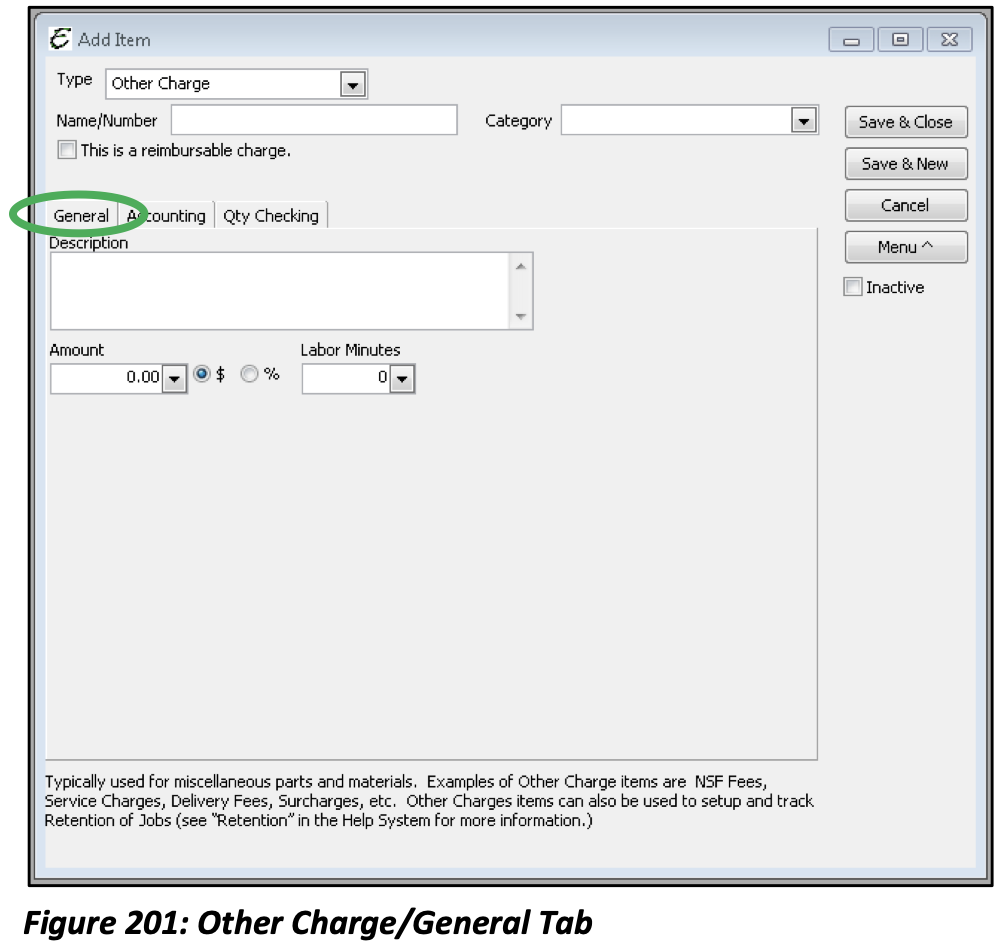
Your business may have miscellaneous charges like shipping, freight, or delivery charges that you need to add to a customer’s invoice. You may also have charges that you want to set up as reimbursable charges. For example, you may incur lifting or crane fees on behalf of clients, and want this item to appear both on bills you pay, and on invoices to a Customer.
This is a reimbursable charge: This option is used when an “other charge” is “bought” then in turn is invoiced to the Customer.
Please note: When checked, this Tab will change to be identical to the Inventory Part’s General Tab and will need to be filled in appropriately.
Description: Enter a description; make sure it is clear and precise. This description will be printed on your sales form.
Amount: Enter a numerical value in the Amount Field. (% or $) If the value varies depending on use, leave it blank here and enter the value manually upon use.
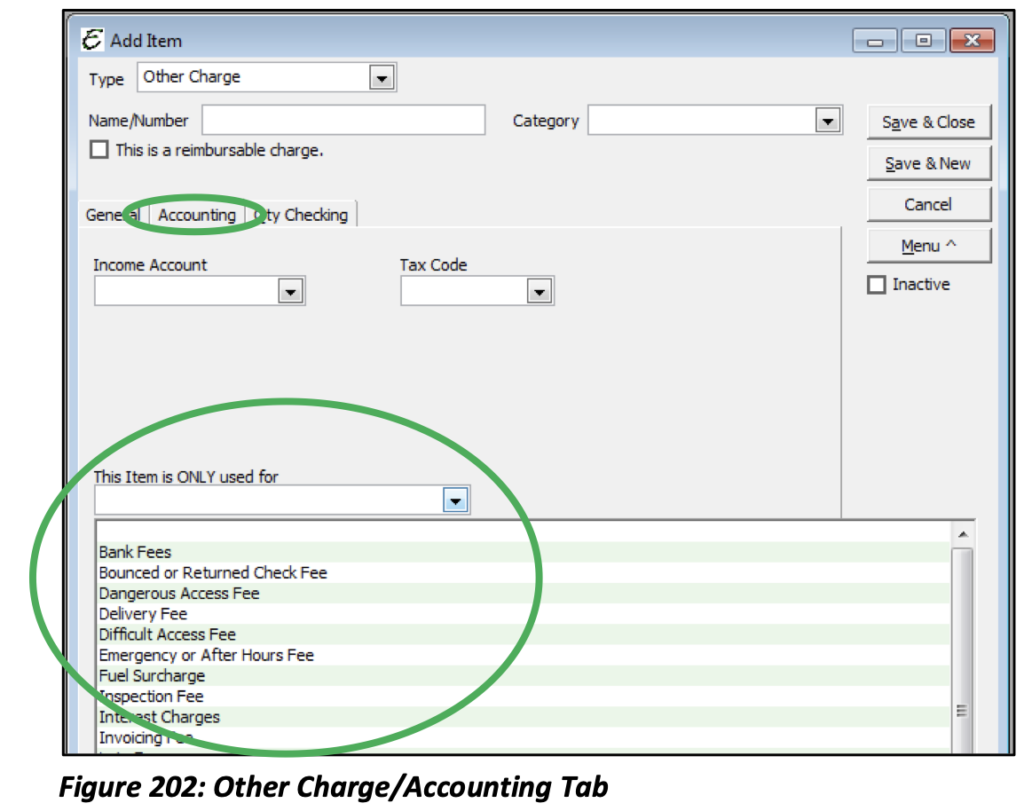
The Accounting Tab gives you the option to choose an Income Account for this particular item as well as a Sales Tax Code (optional). Figure 258 is an example of the new Other Charge form that will be available in Version 10.0.0 or above. “This Item Is ONLY used for” is a new field. It was added so you may tie Other Charge Items to specific usage methods. This will allow for accurate financials. The Qty Checking Tab is identical to the Inventory Part.
Service Item
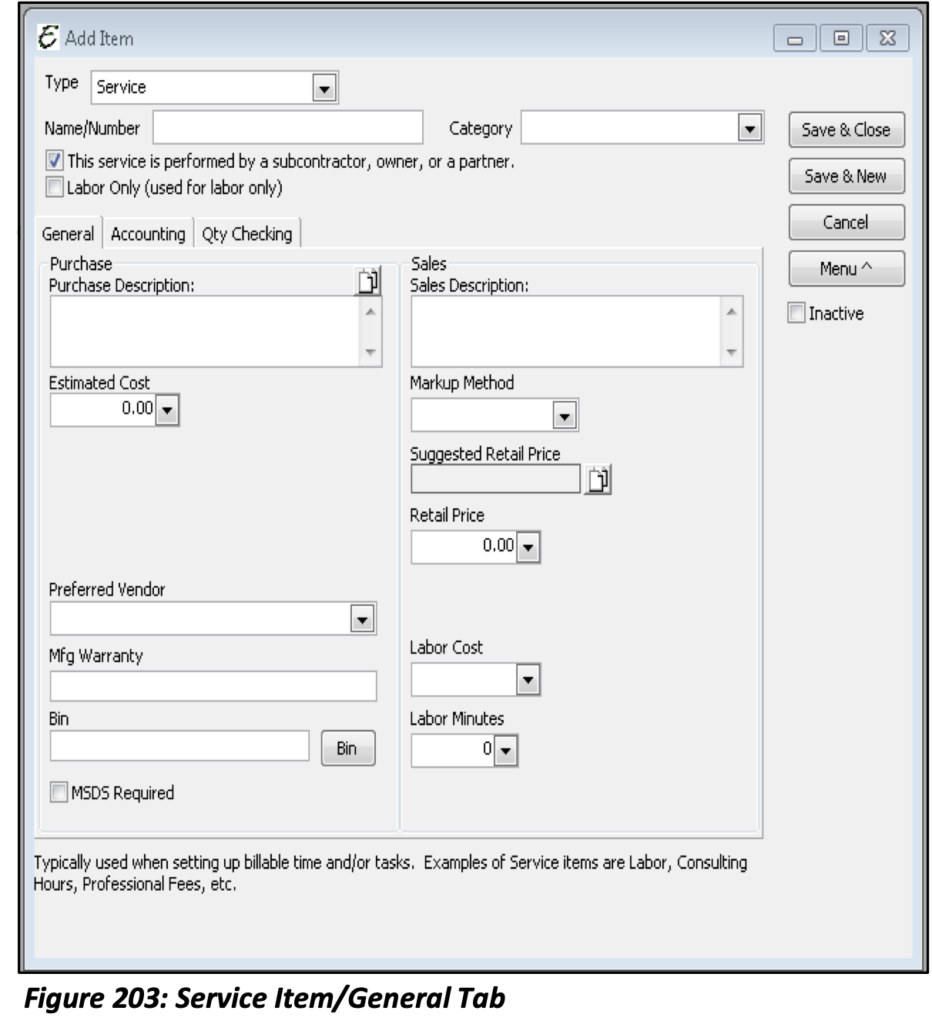
Service Items are items that are actually services (not parts) that you buy or sell. Service Items can include professional fees or labor that you pay for or for services you charge customers. For example, a service item could include; Consulting time, janitorial services, specialized labor, or professional fees.
The information needed for this Item type is identical to the Other Charge new item form, unless the “This service is performed by a subcontractor, owner, or a partner” option is selected.
When this option is selected the fields that appear, minus Equipment Manufacturer and Weight, are identical to an Inventory Part.
This option also adds a selection for COGS/Expense Account to the Accounting Tab of this form. The Qty Checking Tab is identical to the Inventory Part.
The “Labor Only” option describes limiting the sale of this Item as labor charged to customers and nothing else. When checked be sure to enter an Estimated Cost for what the labor costs you. The Estimated Cost would include the employee’s actual labor rate plus employer liabilities and other costs associated with acquiring an hour of labor from an employee. This is also known as Fully Burdened Labor.
Please note: if Labor Only is not checked, certain financial ratios will be wrong and certain reports will indicate no labor sales.
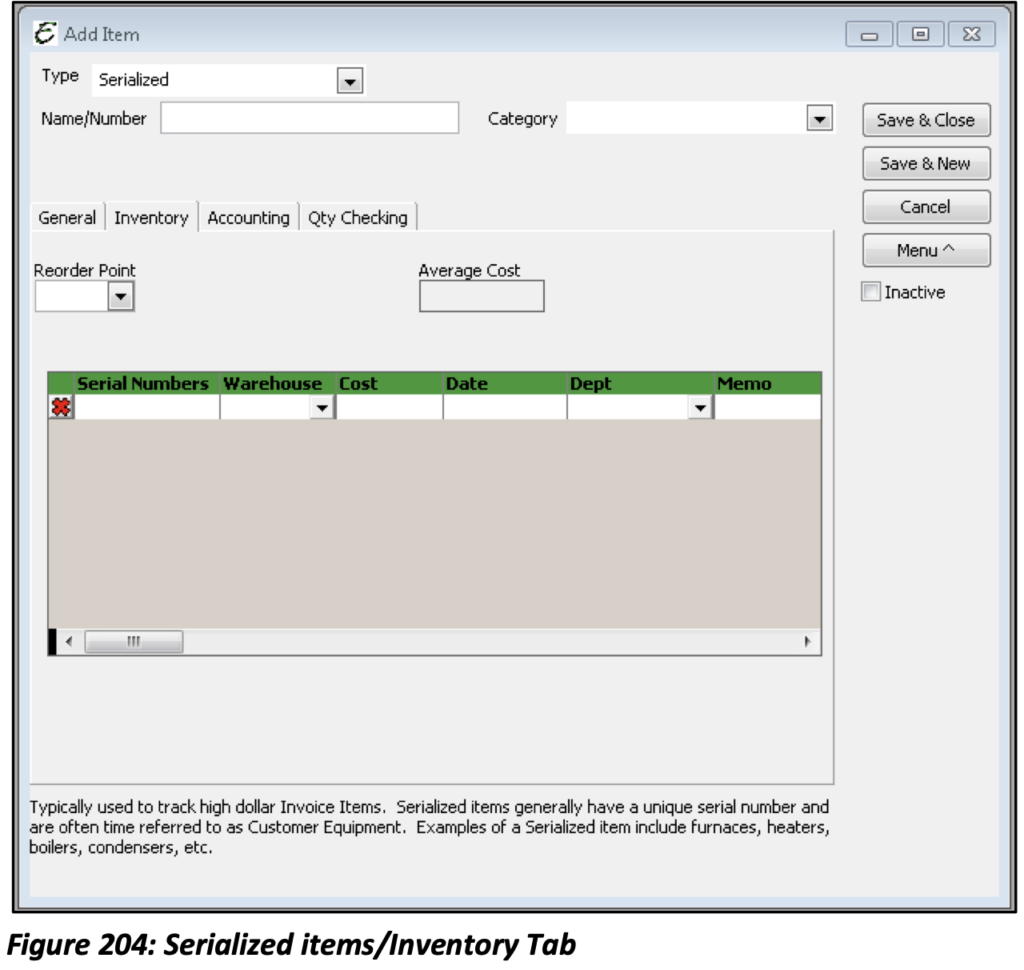
Serialized Items
A Serialized Item is very similar to an Inventory Part, except each and every item is tracked according to its unique serial number. Through Serialized Items, you can track how many items remain in stock after a sale, how many items you have on order, your cost of goods sold, and the value of your inventory. Serialized Inventory tracks the actual cost of each unit per the serial number.
The General Tab for this item type is identical to the Inventory Part. The Serialized Item form includes an Inventory tab. On this tab enter each and every serial number on hand for the item. For example, if you have 15 widgets, each widget will need to be entered into the form with its own serial number, warehouse, cost etc.
On the Accounting Tab you will be asked to select an Income Account, COGS Account, and Asset Account. An optional Tax Code may also be associated with these serialized items.
The Qty Checking Tab is identical to the Inventory Part setup.
Subtotal Item
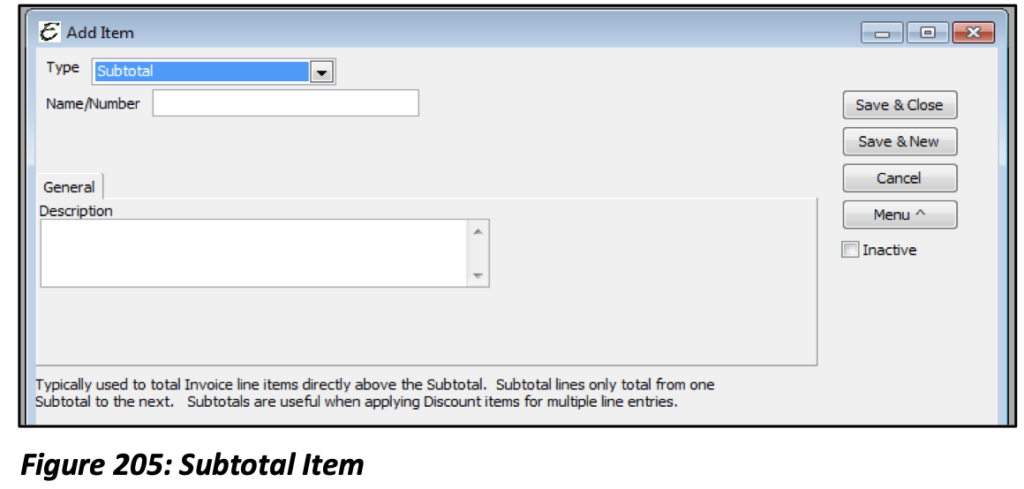
Subtotal Items are used on sales forms to add up the amounts of all the items above it. The summation will include any and all items above it but will stop if there is another Subtotal item. Furthermore, if items are added after a Subtotal Item then those items and only those items will be included if another Subtotal item is added. Subtotals can be used to apply a percentage discount or surcharge to several item at once. Give this Item a name and a description. These are the only fields that are required/available.
Payment Item
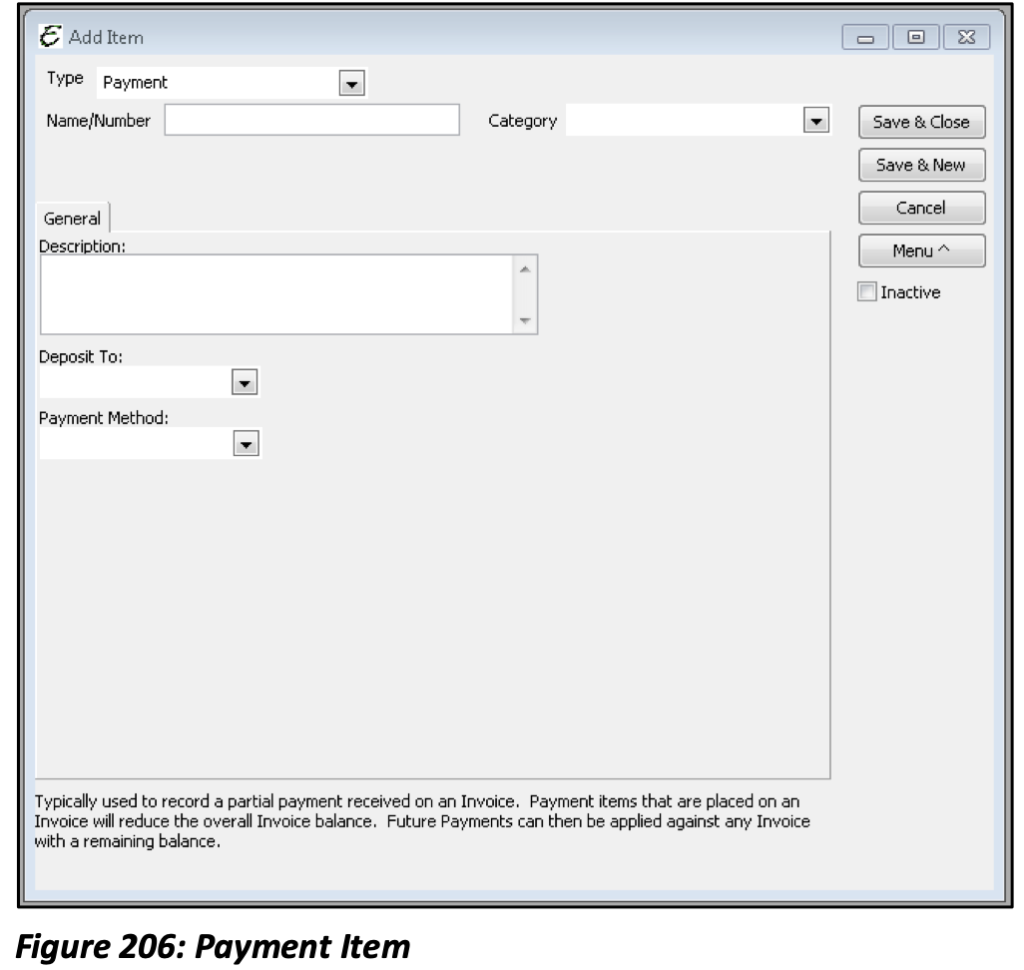
A Payment Item subtracts the amount of a customer payment from the total amount of an invoice. Payment Items can be used when you receive partial payment on an invoice. If you receive full payment at the time of sale, use a sales receipt form instead of a Payment item on an invoice.
Select the account to where the funds from this payment will be deposited and choose the method by which the payment will be made.