Understanding the Dashboard
The first screen that a user will see, after logging in, is the Dashboard. The information seen here pertains only to the user logged in. Menu options beginning with “My …” will only display information pertaining to the user logged in.
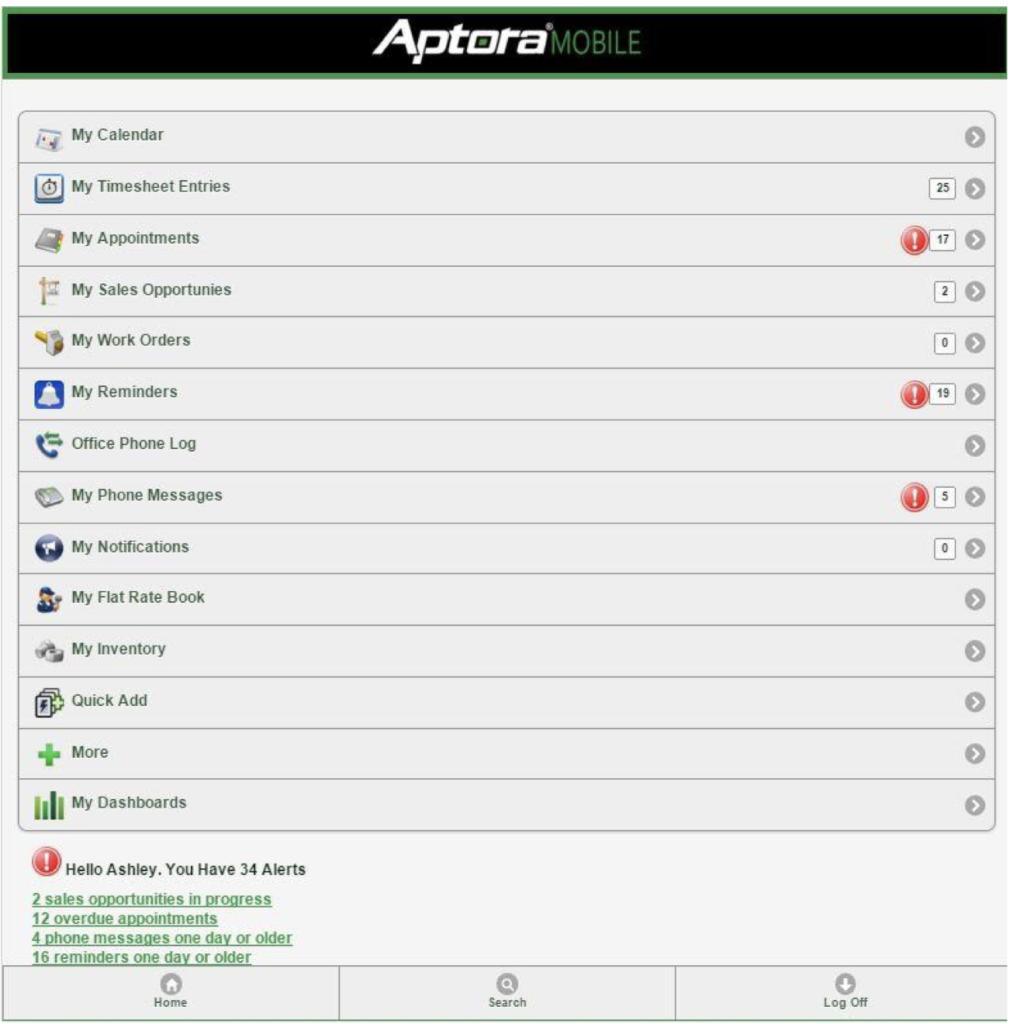
The Dashboard is intended to serve as a hub for the user; a centralized location for all information pertinent to that specific user. The Dashboard contains quick-access menus for Work Orders, Appointments, and Reminders among other things. However, the Work Orders and Appointments the user is shown are only his or her own. This allows the user to quickly view information relevant to his or her position and schedule.
The elements that appear on the Dashboard can be controlled in Display Settings. More on that later in this manual.
My Calendar
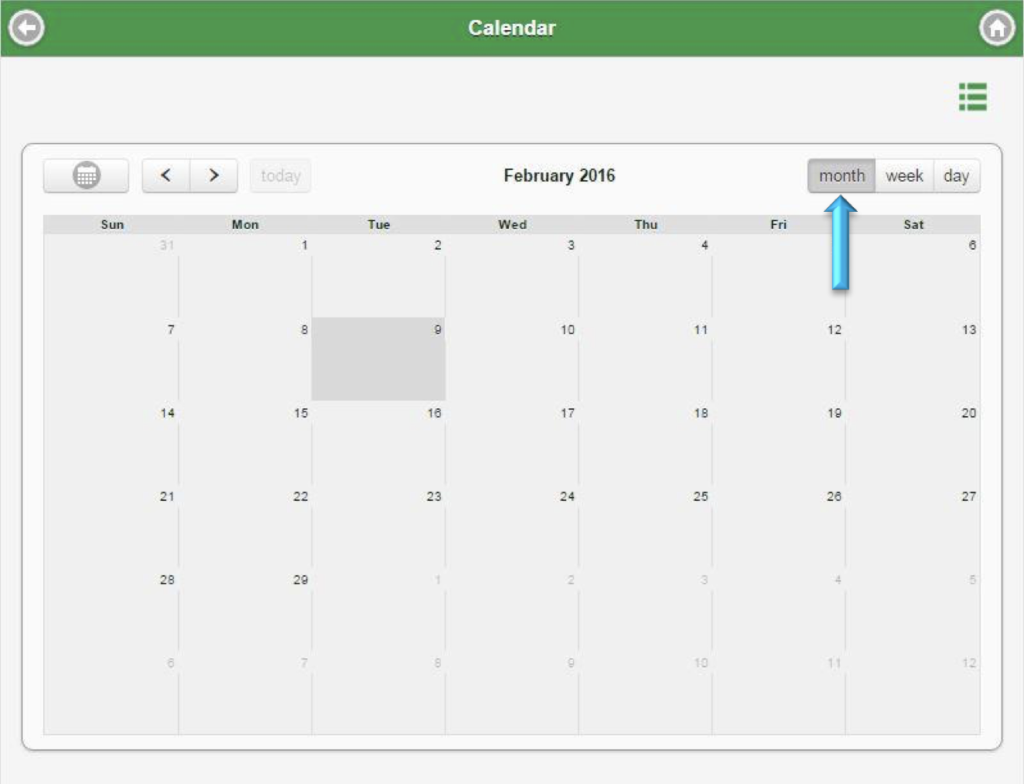
The My Calendar menu option displays the Work Orders and appointments only for the user logged in. This feature will be under going further development. Plans include a company-wide Schedule Board with many added capabilities. To see this feature, users will need to check the appropriate boxes in the User’s Security settings. Allowing this feature is not recommended when using the “Only Display One Work Order on Main Page” user permission setting. The user may choose between Month, Week, or Day view. Based on the display view selected use the scroll buttons to view past, present, or future calendar items for the user logged in.
My Appointments
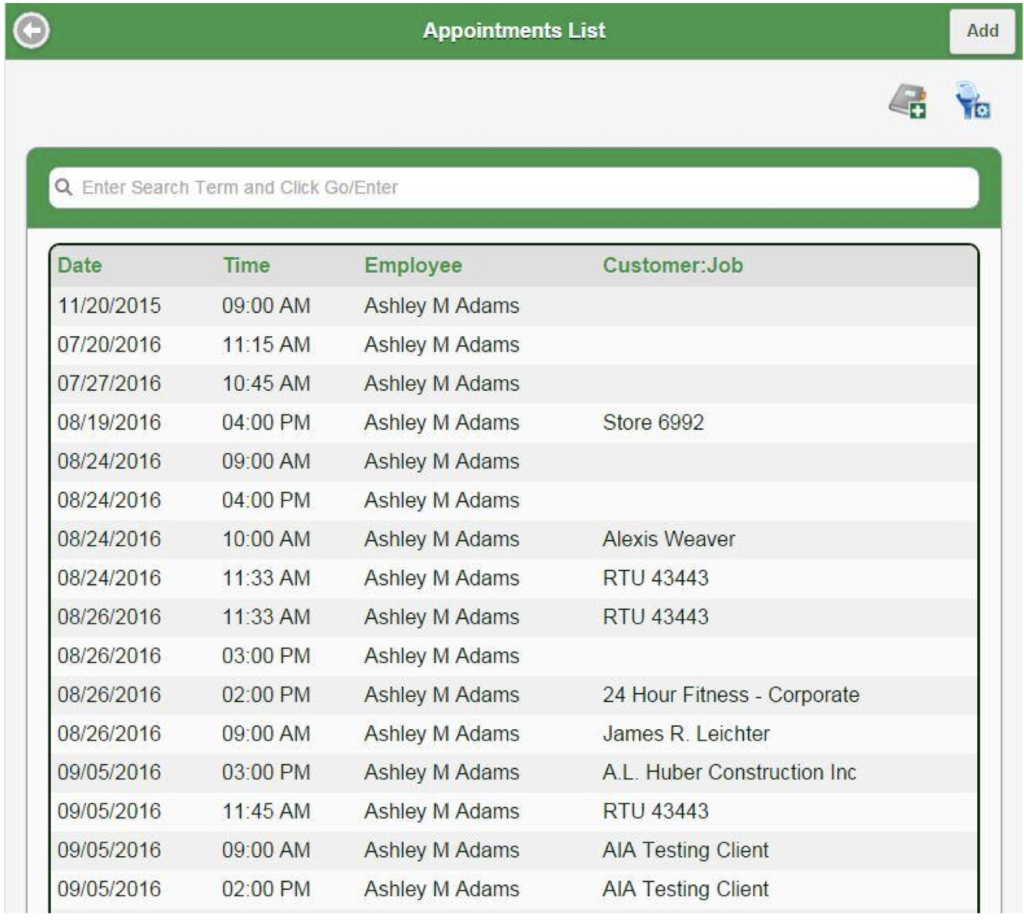
The My Appointments feature displays a list of the logged in user’s appointments. This list displays any appointment(s) assigned to the employee logged in, where the date of the appointment is equal to or earlier than the current day’s date.
Users may currently search by Employee. This feature will be under going further development to include search capabilities for other columns displayed in the list.
My Sales Opportunities
This feature allows users to quickly view Sales Opportunities they might need to pay close attention to. Visibility is controlled through Permissions and Display Settings.
- Sales Opportunity Status = Awarded
- Resolved Date = Within the Last 30 Days
- Employee Assigned = User Logged In (the user’s name is the same)
My Sales Opportunity Follow-ups
All sales opportunities where the Sales Rep equals the User logged in and the Follow-up Date is equal to the current date. The Status does not matter.
My Work Orders
One of the more important elements of Aptora Mobile II to the field service technician is Work Orders and its related features. Aptora Mobile II gives users all the control they need when working with their Work Orders.
Work Orders can be both viewed and edited. Additionally, users can print, email, capture signatures, and create invoices from their Work Orders. Work Orders will be explained in more detail in the Add Work Orders section of this manual.
The My Work Orders feature displays a list of Work Orders for the user logged in. This list displays all Work Orders assigned to the employee logged in, where the date of the Work Order is equal to or earlier than the current day’s date and that is not marked as “Completed” or “Canceled’. The list will load the user’s Scheduled, En Route, Working, & Dispatched Work Orders through the current day’s date. Users may search by Customer: Job and future development will allow the ability to search by other column data displayed in the list.
Advanced Filter Icon
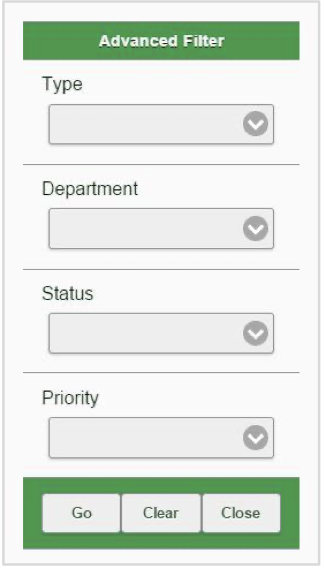
The My Work Orders list also allows a user to enter a more filtered search, by using the Advanced Filter. The Advanced Filter can filter results based on Type, Department, Status, & Priority. Make the appropriate selections, and click the ‘Go’ button to view results.
Whatever filter criteria is entered, if not cleared, will be used the next time the My Work Orders list is opened. Click the ‘Clear’ button to clear the current filter, and click the ‘Close’ button to close the Advanced Filter.
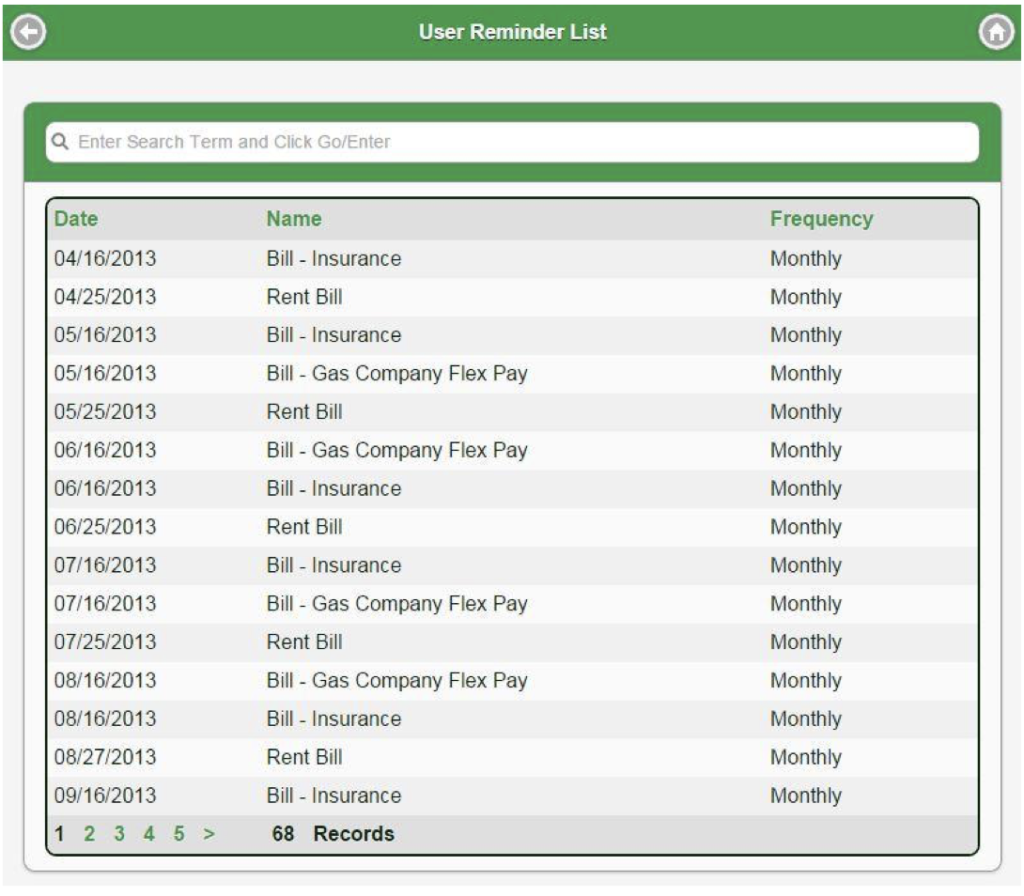
My Reminders
The My Reminders feature allows the logged in user to quickly view any reminders assigned to the user. This list displays all reminders assigned to the employee logged in, where the date of the reminder is equal to or earlier than the current day’s date and that is not marked as “Completed”.
Reminder items found in the list can be edited to change a particular reminder’s status to “Completed”. Once completed, the reminder item will be removed from the My Reminders list, and, if the reminder was one day old or older, the Alerts list on the Dashboard.
Office Phone Log
The Office Phone Log feature displays information from Aptora’s New Caller ID system. Users have to own the New Caller ID system in order for this feature to be displayed. A complete log is kept of each call including time and date, telephone line number, phone number, duration of call, inbound DTMF (the numbers the caller entered), and caller name (if available). The system also tracks outbound calls.
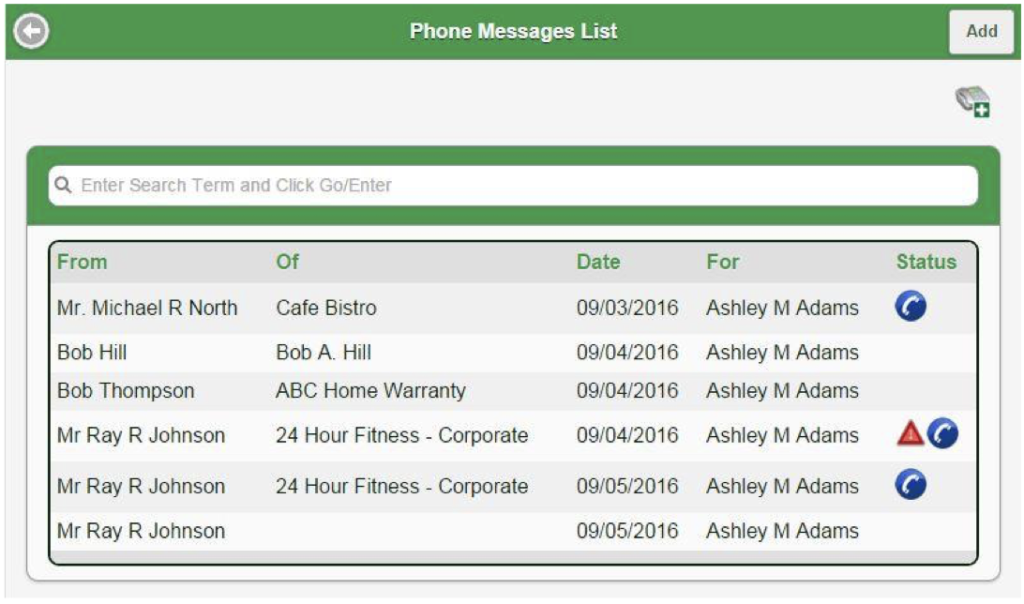
My Phone Messages
The My Phone Messages feature displays a list of phone messages for the user logged in. This list displays all phone messages assigned to the employee logged in, where the date of the phone message is equal to or earlier than the current day’s date and is not marked as “Read”. Certain information pertaining to a phone message can be edited, such as, Read (Yes or No) and Message Notes.
My Notifications
The My Notifications feature displays a list of notifications for the user logged in. While in the Dashboard view, My Notifications will have a red exclamation point with a number next to it should you have any notifications.

If the user has any, there will be a number next to the menu, such as My Notifications (8). This indicates the user has eight notifications. In order for this feature to work, the user’s name must be setup to receive a notification each time a Contact Log entry is made or edited in a certain record (like a work order or job).
Click on the “My Notifications” to view a list of Contact Log entries. There is a search bar at the top of the list. You also have sorting and filter options available. By default, only “Unread” messages will be shown.

A Notification is a brief summary of the respective Contact Log entry. The user may click on the Notification to read the entire Contact Log entry.
Click on each Contact Log entry to open and read. Set the “Read” slider to Yes to mark the message as read.
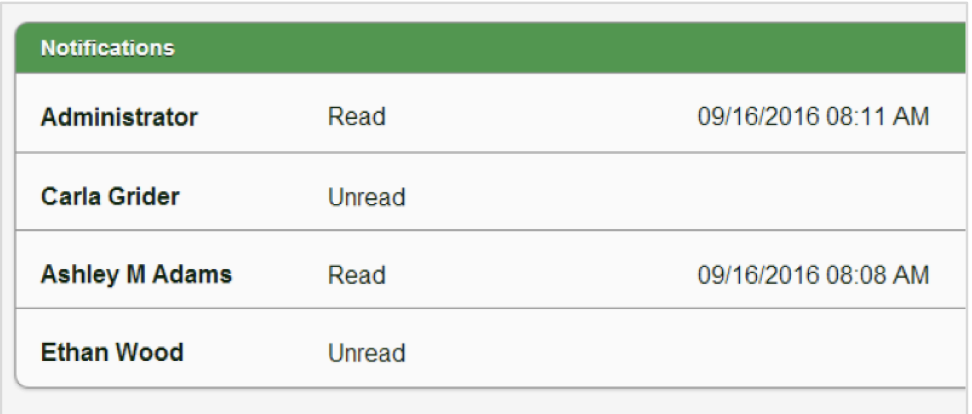
Click on each Contact Log entry to open and read. Set the “Read” slider to Yes to mark the message as read.
Other people in the My Notifications group will be able to see that the user has read the Contact Log. The table below includes the date and time the message was first read.
Notifications List
- To see an entire list of all notifications, regardless of employee or record, click More > Lists > Notifications. There is a search bar at the top of the list. Sorting and filter options are available. By default, only “Unread” messages will be shown. If the user does not have software permissions for this feature, the user will not see this option.
- When a Notification is one day or older, an Alert will appear at the bottom of the Dashboard (Home) page. Example: You have 4 overdue Notifications. The notification is a hyperlink that will take the user to his/her Notification list.
Tips and Troubleshooting
- If notifications are not being emailed or texted to employees, check Aptora Mobile II’s Email setup. From the Dashboard (Home), click More > Settings > Email Setup. Carefully check your settings. Click the Test Settings button to send a test email. There may be firewall issues, security settings, junk mail filters, or other complicated matters that need to be addressed. Talk to a qualified IT professional if you are not familiar with these subjects.
- Be sure valid email and text message entries have been entered for each employee that will need to be texted or emailed. This must be done in Total Office Manager.
- Contact Log permissions are required for users to view the entire Contact Log entry. For example, if you wish to grant permission for an employee to see Notifications related to your list of Vendors, that user will need “Lists: Vendor Contact Log” permission. Be sure that you have granted proper permissions for each user.
- Most email providers limit the number of emails that a user can send per day. The limit varies but rarely exceeds 200 (called SMTP relays). If you notice that your email stops working towards the end of the day, you may have exceeded your email allowance. Contact your email provider. Keep in mind, Aptora Mobile II also uses your email system to send text messages.
- Users are notified when an existing Contact Log is edited. The data of the notification does not change. The Contact Log entry is marked “Unread”.
- You need to setup notifications for each employee and each customer, vendor, etc., independently. There is no global setup for all employees or all jobs.
- Since the Administrator is not an employee, they cannot receive email or text message notifications.
- When a Contact Log is added or edited in Total Office Manager, you will receive the same mobile alerts and notifications as if the Contact Logs were added or edited using Aptora Mobile II. Contact Log entries made in Aptora Mobile II will be seen in Total Office Manager as usual. The actual Contact Log Notification System is only available in Aptora Mobile II. It is not part of Total Office Manager.
- If you respond to an email or text notification with an email or text, that information will not be saved in the record’s Contact Log. If you wish to automatically keep all communication in the Contact Log, you will need to add your response to the Contact Log.
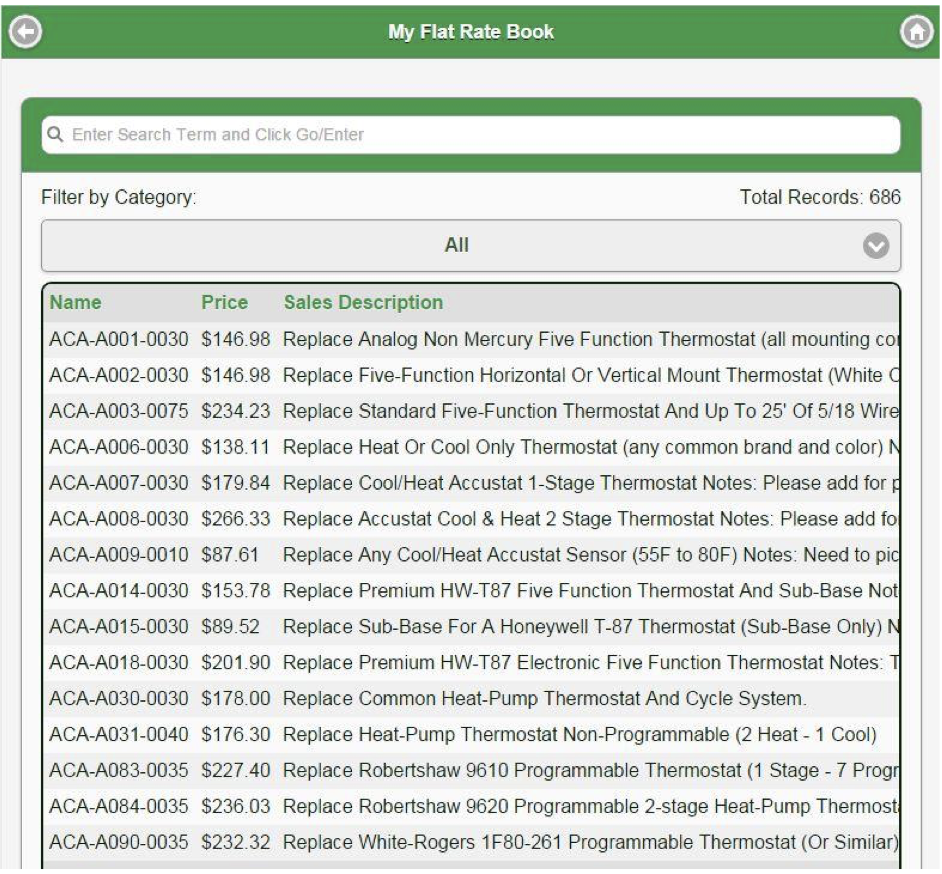
My Flat Rate Book
The My Flat Rate Book feature displays the Flat Rate Plus Technician Service Book imported into Total Office Manager from the Flat Rate Plus software. The Flat Rate Book can be filtered by Category, and specific flat rate tasks can be searched for by name. Flat Rate Plus data cannot be updated or edited using Aptora Mobile II.
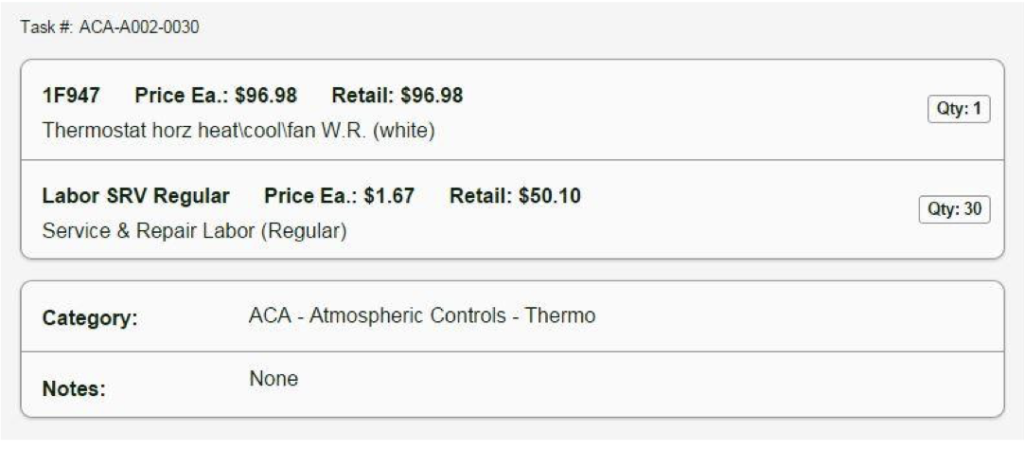
Clicking on any specific flat rate pricing code (or “Task”) opens the individual task where a “More” button (not shown), when clicked, displays the labor and materials for that task.
My Inventory
The My Inventory list includes all items that have a type equal to “Inventory Part” or “Serialized”. The items must either be stocked in the warehouse assigned to the employee or have some history of being sold into or out of their warehouse.
- If the item or warehouse is inactive, it will not be included.
- In Total Office Manager, the warehouse needs to be assigned to the mobile user (your employee). Remember, a warehouse is a location for inventory storage.
Alerts
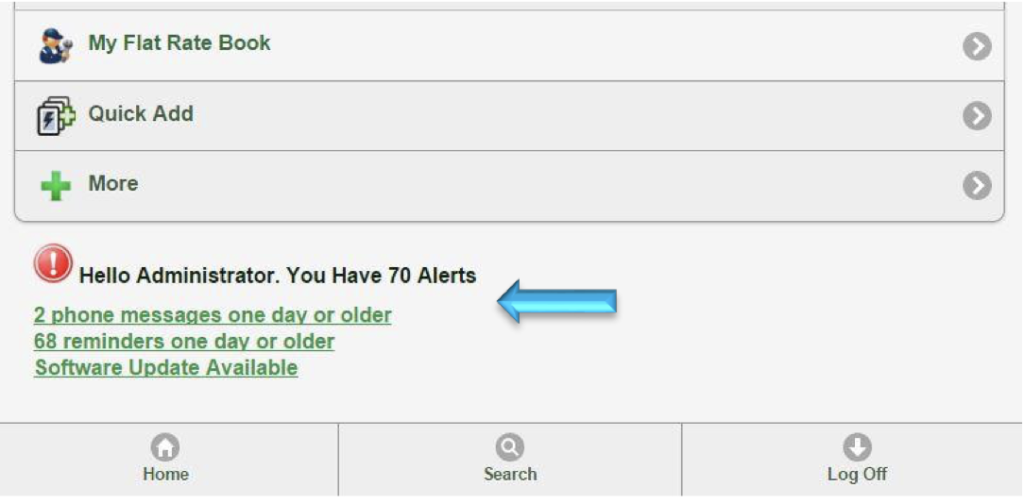
Shown in the following image, this list includes Work Orders and Appointments that are late or overdue. It includes Reminders and Phone Messages that are one day or older. You can click on a specific Alert to open its list. The Alerts section on the Dashboard is intended to alert the user to information that needs their immediate attention.
Quick Add
The Quick Add feature in Aptora Mobile II allows a user the ability to quickly add some of the more common tasks found in the software. A step-by-step explanation of each Quick Add option can be found in the pages to follow.
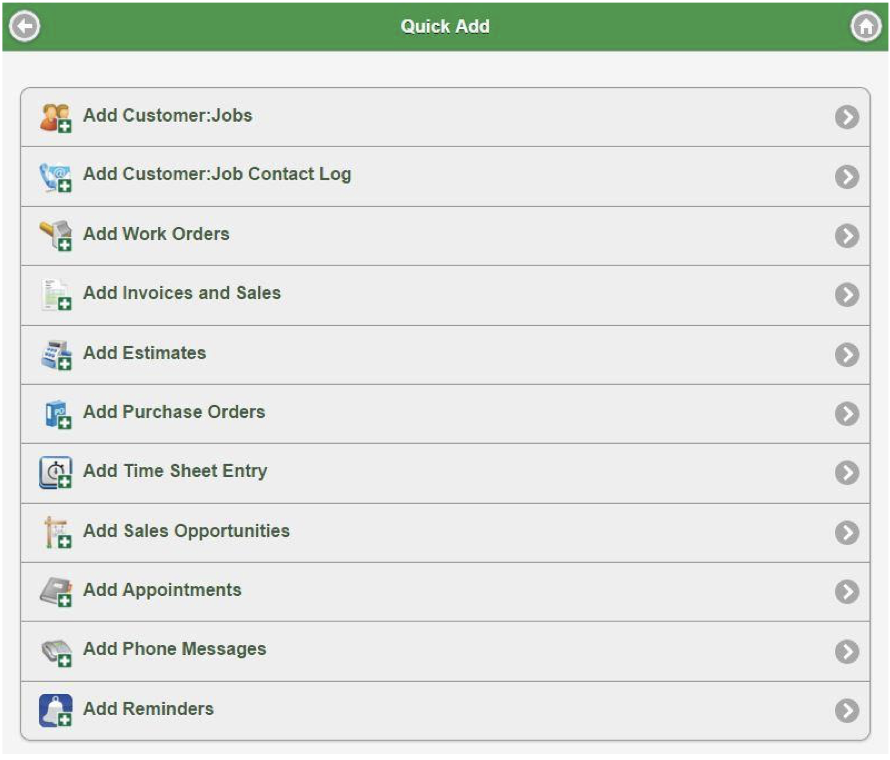
Use the Quick Add feature to add:
- Customer: Jobs
- Customer: Job Contact Log Work Orders
- Invoices & Sales
- Estimates
- Purchase Orders Timesheet Entries
- Sales Opportunities Appointments
- Phone Messages Reminder

