Contact Management
Contact Management is a key component in increasing sales and customer retention as well as controlling expenses and maintaining Vendor relations.
By consistently maintaining your contact management database, departments within your organization such as sales, marketing, customer service, help desks, etc. are able to collaborate together and coordinate cross-function activities.
Customers:Jobs
A Customer:Job can be defined as anyone on your receivables list. Your Customer:Jobs are all of your customers and the jobs you do for them. There are three key components to Customer:Jobs. They are creating new customers and maintaining old customers. Old customers include current (active) customers and previous (inactive) customers. This list will likely contain prospects – those who have not yet spent money with you but have had some sort of contact with.
New Customers:Jobs
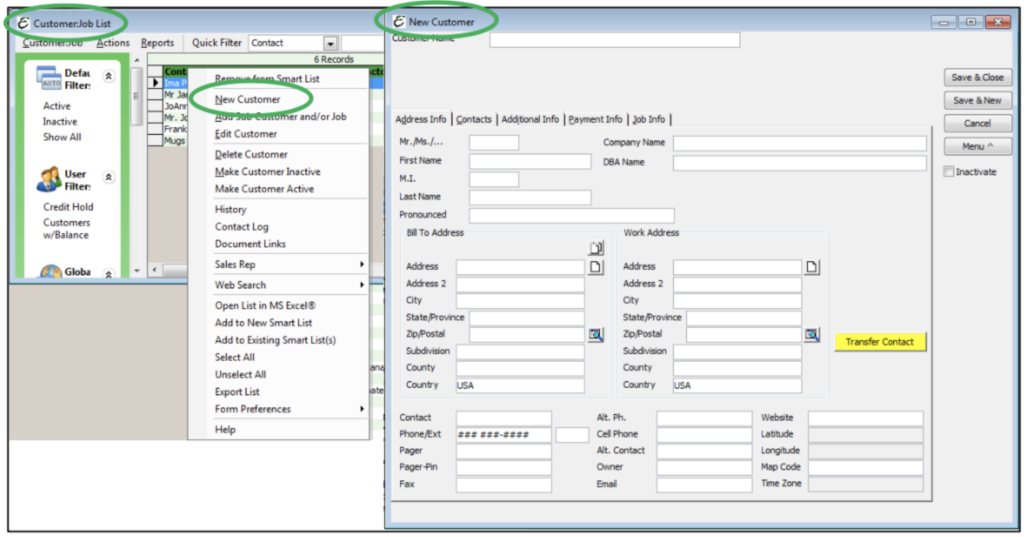
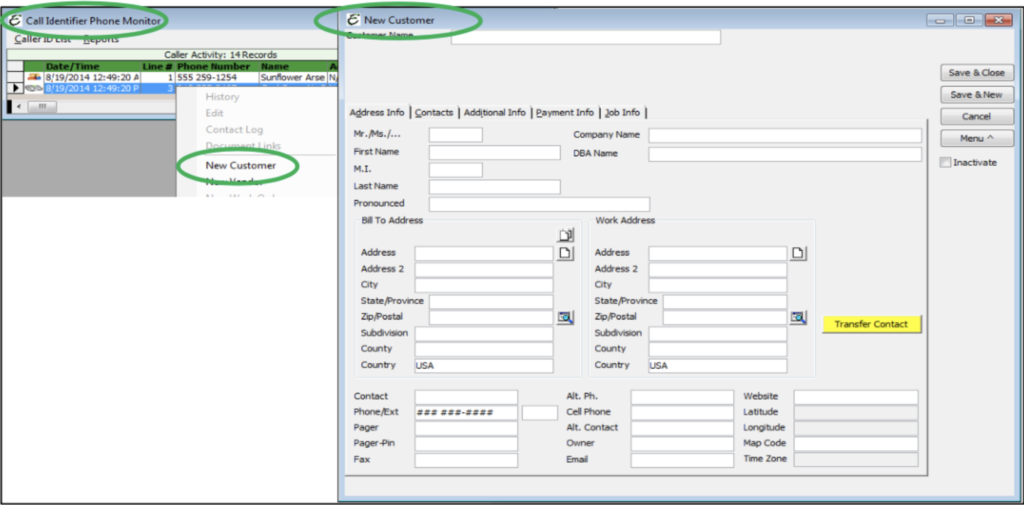
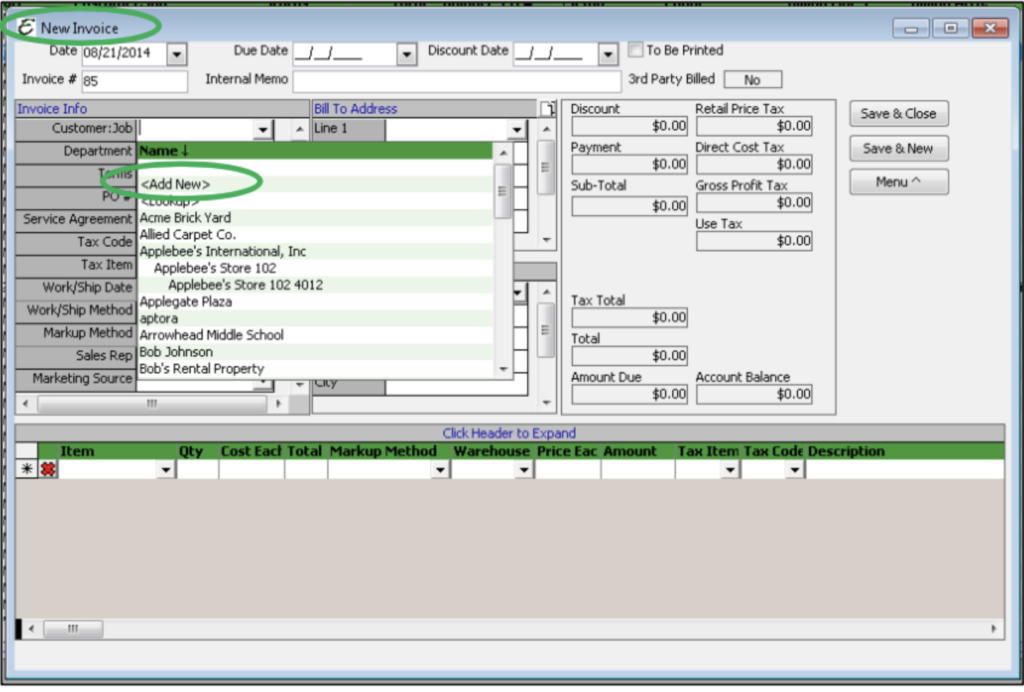
Total Office Manager offers multiple ways to access the New Customer screen. There are four listed here to get you started. You may access the form through the Customer Menu; the Customer: Job List, the Phone Monitor, and <Add New> when creating a new Invoice. See figures below. Regardless of how you get there, creating new customers is a painless process as long as you have all the pertinent information. You will need the customer name along with any information required from Preferences tosave a new customer record.
Please note: You may add a new customer from any form that is tied to customer information using the add new option from the Customer:Job Name Look up.
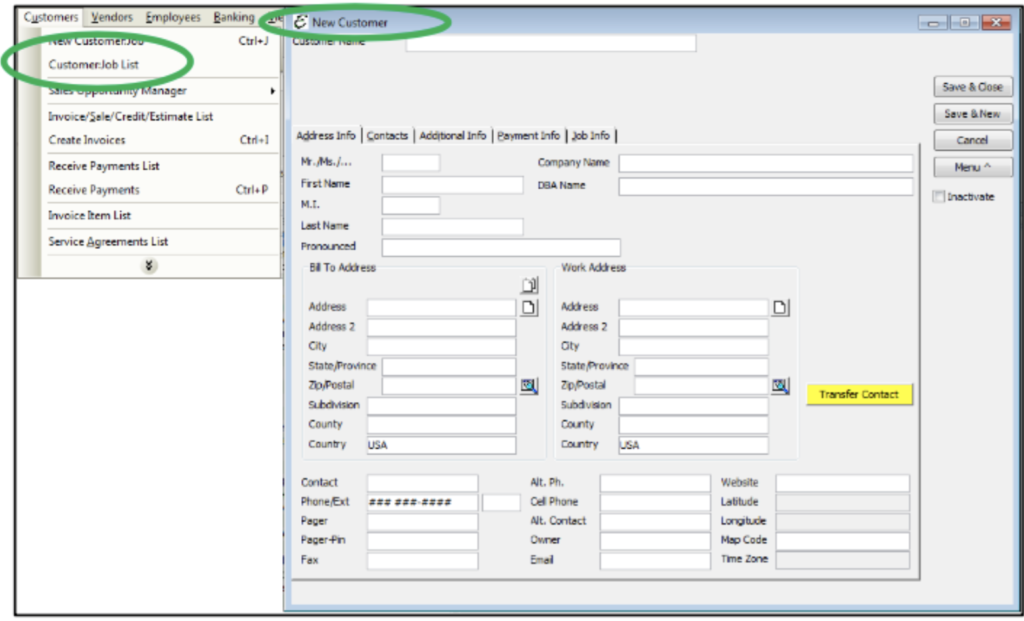
Address Info

The Address Info tab of the Customer:Job form is where basic contact information for a customer is recorded. Some of the Customer Preferences the Administrator set up in the Company Preferences will come into play here like “Auto Populate Customer Name Field”. If enabled, it will populate the “Customer Name” field based on what you type in the First Name, MI, and Last Name. Please review the descriptions of the information that can be included on this tab.
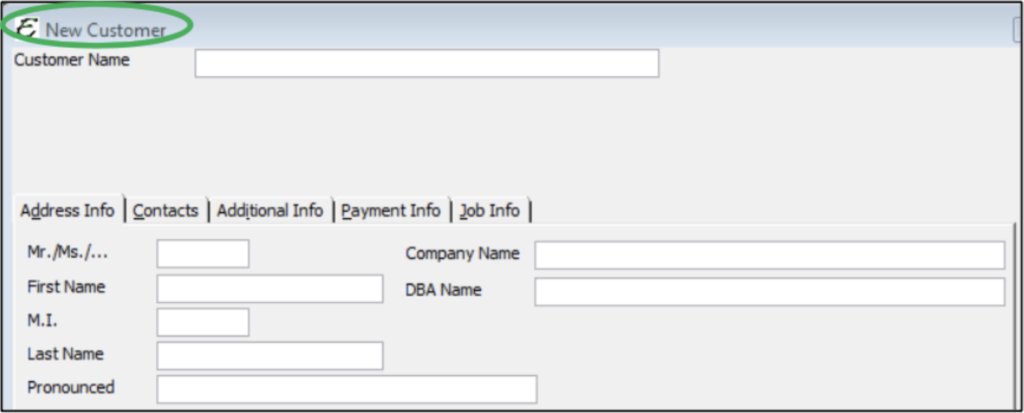
Customer Name: This the primary field used to search and select customers on all transactions in the software. This field is required by Total Office Manager.
Mr./Mrs./: (Optional) Enter if you use these types of titles with your customers.
First Name: Enter the first name of the customer.This is optional, but recommended.
M.I.: Enter the middle initial of the customer, if applicable.This is optional, but recommended.
Last Name: Enter the last name of the customer.This is optional, but recommended.
Company Name: Enter the company name the customer does business under, if applicable.This is optional, but recommended.
DBA: (Optional) The name the Customer is Doing Business As.
Parent(if used): This is only available when you have created a “child” or job. This selection is the parent of the child (or job). You can change the parent if needed by clicking the parent drop-down.
Pronounced: Enter the phonetic pronunciation of a difficult customer name.For instance, if the customer’s name was “Leichter”, you might enter “Liked-Her” in the Pronounced field.
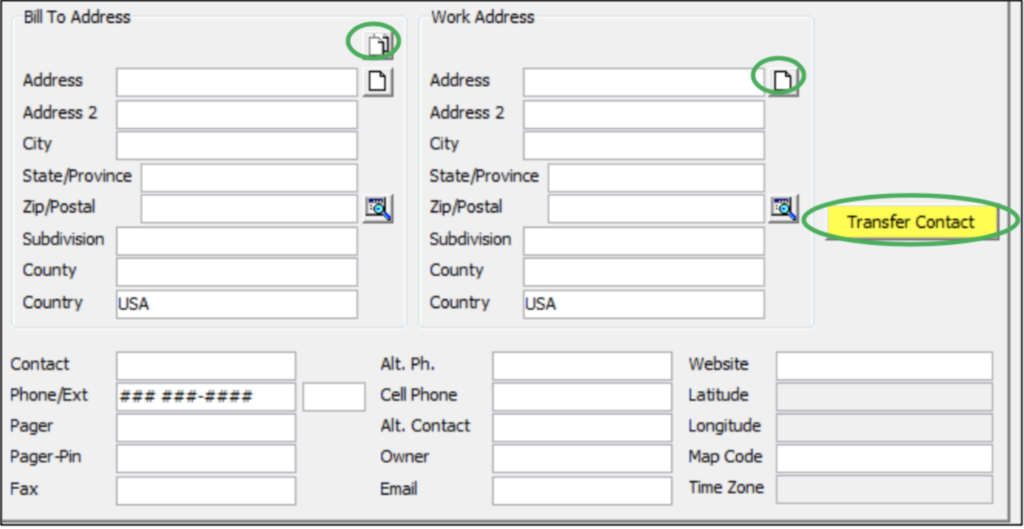
Please note: By clicking on the icon of the double piece of paper, all the Bill To Address information will be transferred to the Work Address. However, information is automatically copied from the Bill To fields to the Work Address fields if that preference is activated in the Preferences form.
Bill To Address: Enter the mailing address where the customer wants the bill sent to.
Work Address: Enter the address of where the service is to be performed (or where the product is to be shipped).
Please note: Clicking the single sheet of paper next to the Address in both Bill To Address and Work Address will copy this information and allow you to paste this information into a notepad.
Contact: Enter the contact name for the customer.
Please note: If you select the yellow Transfer Contact button, the Contact information will transfer to the Contact Tab of the New Customer form. Once the customer has been saved, this button will no longer appear.
Phone/Ext: Enter the customer’s phone number and the extension if applicable.
Pager: Enter the customer’s pager number if applicable.
Pager-Pin: Enter the customer’s pager-pin number if applicable.
Fax: Enter the customer’s fax number if applicable.
Alt. Ph.: Enter an alternate phone number if applicable.
Cell: Enter the customer’s cell Phone number if applicable.
Alt. Contact: Enter the name of the alternate contact.
Owner: Enter the name of the company’s Owner.
E-mail: Enter customer’s e-mail address if applicable.
Website: Enter customer’s website address if applicable.
Map Code: Enter in the Map Code for a quick reference if you are using Microsoft MapPoint®.
Latitude/Longitude: Total Office Manager auto-fills this information for mapping purposes.
Time Zone: This is auto-filled with Time Zone information.
Contacts
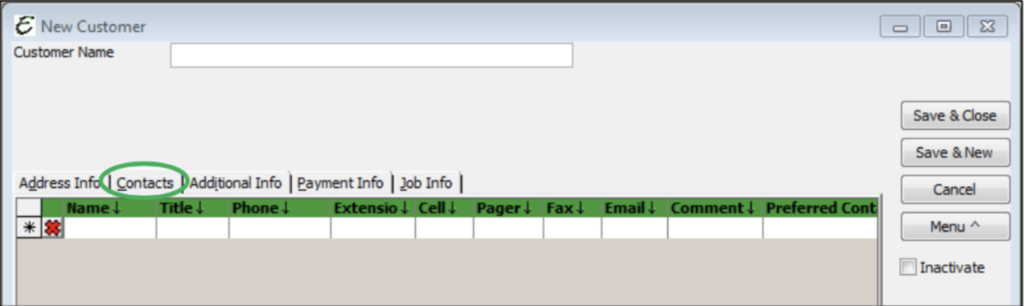
Contacts should include any and all contacts you have with the customer. You will need to enter in the Name, Title, Phone (Main Number), Extension, Cell, Pager, Fax, Email, Comments, Preferred Contact (Method of Contact) and Alternative Phone Number. Titles can be found as you type or pulled from the drop-down. You may add a new title to select from. Once you have added the Title, it will be added to the Title drop-down selection in the record type specified on the new Title form.
Additional Info
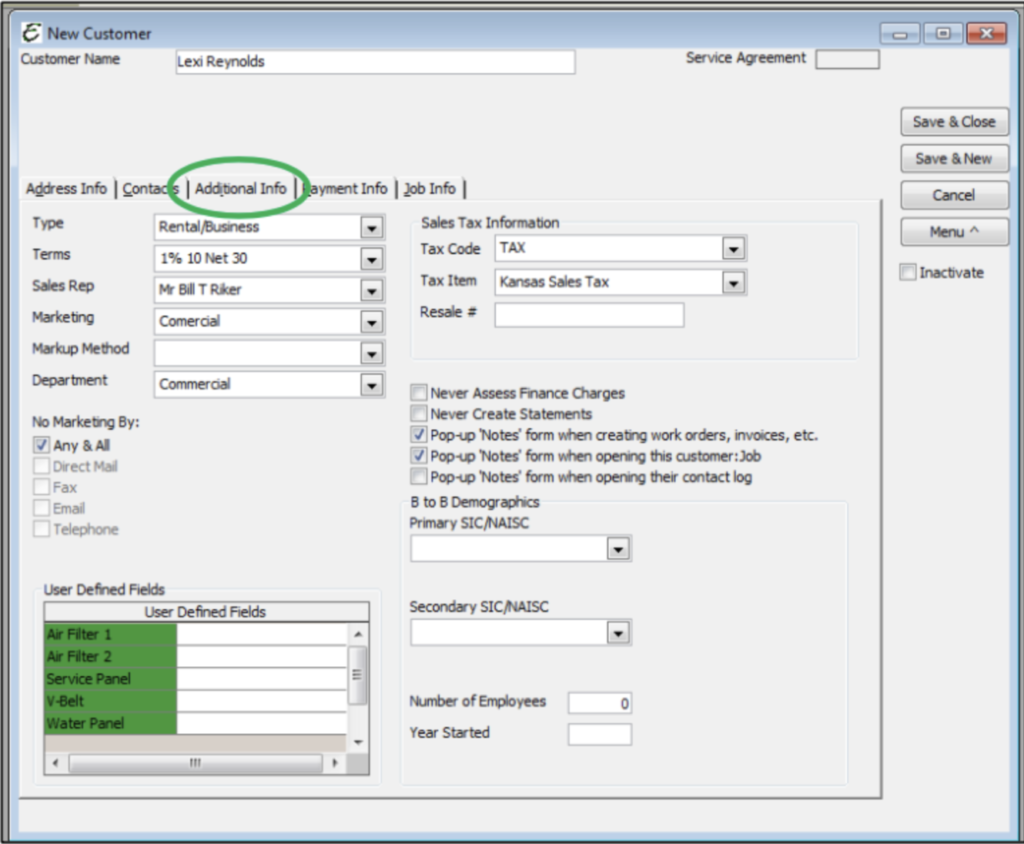
The Additional Info tab of the Customer: Job form is used to store a variety of miscellaneous customer information. This is also where to control pop up notes for the customer. Please review the following descriptions of the information needed for each field in this tab.
Type: Select from the drop-down menu the type of customer you are setting up, residential, commercial, government, or your classification for the customer.
Terms: Select from the drop-down menu the terms you are offering the customer on their invoices, 2% 10 Net 30 Days, Net 15 Days, etc.
Sales Rep: Enter the name of the sales representative you have assigned to this customer, if applicable. This can be an Employee or a Vendor.
Marketing: Select from the drop-down menu the Marketing media that brought the customer to your company.
No Marketing: This is used like a do not call list. When this checkbox is checked, the customer will not appear in any Marketing List Generator results.
Tax Code: Select from the drop-down menu the tax code that applies to the customer. (Is the customer taxable or non-taxable?)
Tax Item: Select from the drop-down menu the tax item that applies to the customer.
Resale #: Enter the customer’s resale number if you do not charge the customer sales tax. When a person gives you a resale number, they are asking not to pay sales tax because they plan to resell the item, collect tax, and forward that collected sales tax to the proper authorities. This is the number issued by their local sales tax authority.
User Defined Fields: Enter information not found on the standard form. User Defined Fields selected to show on Customer:Jobs will be included.
Never Assess Finance Charges: Checking this checkbox ensures that the customer will never be made available when assessing finance charges on overdue accounts.
Never Create Statements: Checking this checkbox ensures that the customer will never be made available when generating statements to customers.
Pop up Notes form when creating work orders, invoices, etc.: Checking this checkbox causes the customer notes to automatically appear when work orders, invoices, and such for the customer are opened or created.
Pop-up Notes form when opening this Customer:Job: Checking this checkbox causes the customer notes to automatically appear when opening this Customer:Job form.
Pop-up Notes form when opening their contact log: Checking this checkbox causes the customer notes to automatically appear when opening the Customer:Job contact log.
Payment Info
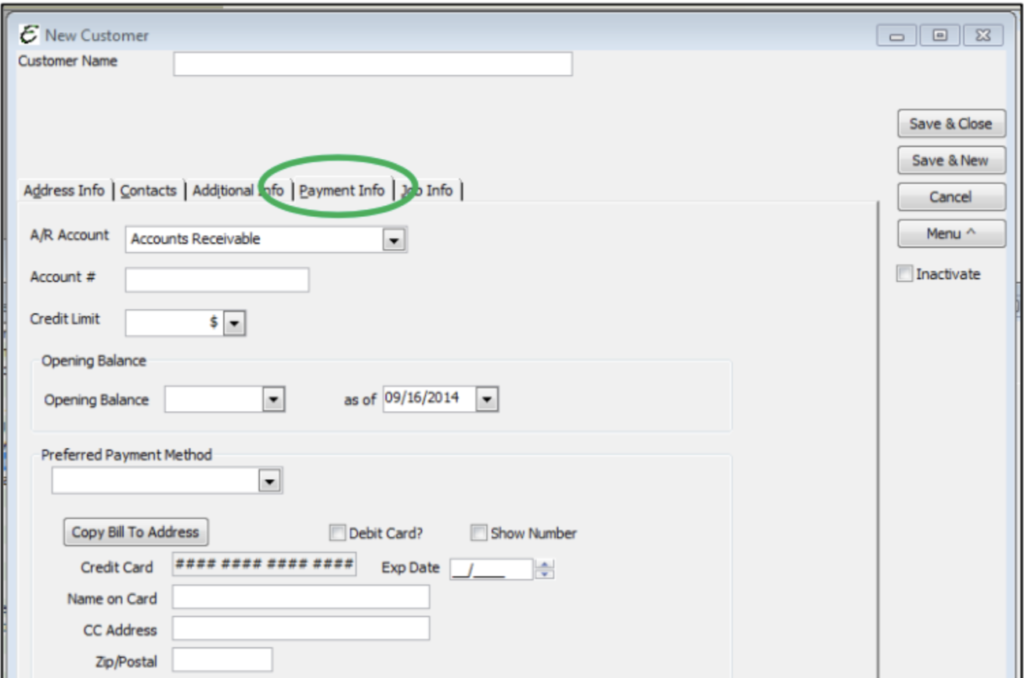
The Payment Info tab of the Customer: Job form is used to specify default customer payment information. This is where you manage payment and card information for the customer, and where to place delinquent customers on credit hold. Please review the following descriptions of the information needed for each field in this tab.
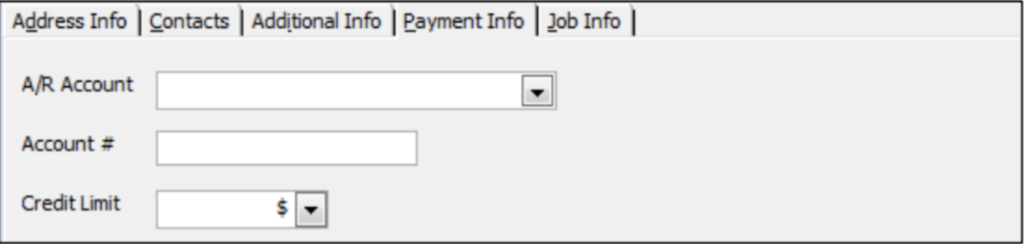
A/R Account: From your COA, choose whatever accounts receivable type of account to use to for this customer. This is the account which will track any money the customer owes. This is a required field.
Account: Enter any account number your company assigns to the customer. This is not a required field.
Credit Limit: If any credit terms have been extended to the customer, enter the maximum amount that credit here (Example $500.00, $1000.00, etc.) This is not a required field.
As Of: The date the opening balance was accurate.

Figure 37: Opening Balance
Opening Balance: The amount of money the customer owes you as of the “As Of” date noted below. (Use this if you have NOT entered every single invoice into Total Office Manager that has a balance due. Typically, this only applies when setting up a new company file and transferring customer balances form a prior company file or software program.)
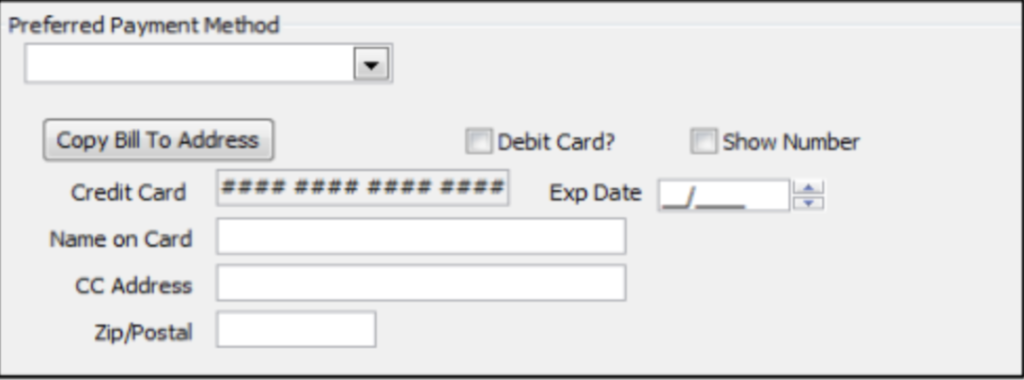
Figure 38: Preferred Payment Method
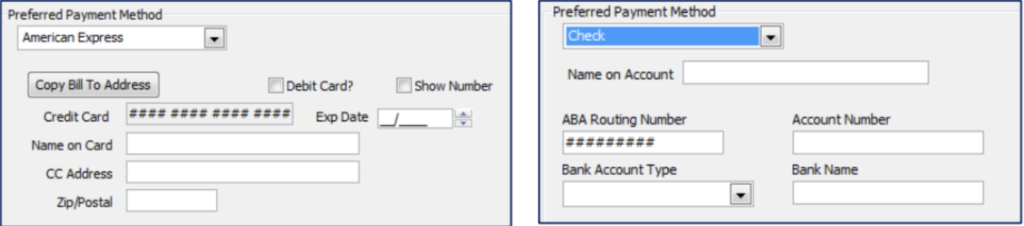
Preferred Payment Method: Select a payment method from the drop-down box. If a payment method is not in the list, click “<Add New>” from the top of the list to easily create a new payment method.
Copy Bill To Address: If the billing address on the Address Info tab is identical to the credit card billing address, click this button to copy the previously entered address to the credit card area.
Debit Card?: When checked, the “Debit Card?” checkbox indicates that the card is a debit card rather than a true credit card.
Show Number: When checked, the Show Number checkbox displays the entire credit card number. When unchecked, the checkbox displays only the last four digits of the credit card number. You will need to check this box in order to enter a credit card number.
Credit Card: Enter the customer’s credit card number.
Exp. Date: Enter the expiration date that appears on the credit card. Example: 07/2011.
Name on Card: Enter the name as it appears on the credit card.
Address: Enter the address of the credit card owner.
Zip Code: Enter the zip code of the credit card owner. Be sure it is correct, as many authorization companies rely on it heavily.
Please note: When switching between Payment Method Types of Credit Card or Check, the payment info fields change from Credit Card to Bank Account.
Job Info Tab

The Job Info Tab is used to track information on a specific job, typically larger jobs, for an existing customer. Job Info is used for”job costing” a particular job, because COGS & expenses can be attributed to it. Fields exist to track the job type, foreman, job status, start date, projected end date, job completion date, and projected total. You can also select an estimate that goes with the job. If required, a virtually unlimited amount of job details can be entered here. Additional overhead can even be applied to a particular job (for job costing) from within the Job Info tab. Please review the following descriptions of the information needed for each field in this tab.
Please note: You may enter this information when you enter a New Customer or editing an Existing Customer.
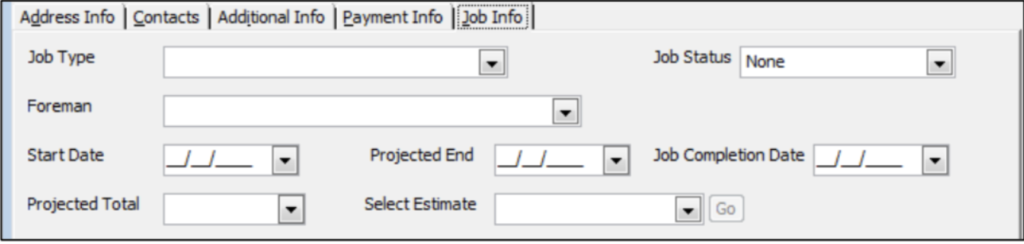
Job Type: Enter a word or phrase you want to use to categorize the job you are performing for the customer. Select from the drop-down menu or you may also create a new Job Type, if the Job Type you need, is not in the list. You can filter reports based on job types.
Job Status: Is used to indicate the status of the job you are performing for the customer. Click the drop-down to select None, Pending Awarded, In Progress, Closed,or Not Awarded. This selection is optional. These choices can’t be added to or changed by the user.
Foreman: Select the job foreman from the drop-down list of employees.
Start Date: Enter the starting date of the job you are performing for the customer.
Projected End: Enter the projected ending date of the job you are performing for the customer.
Job Completion Date: Enter the ending date of the job you performed for the customer. This is the actual date the job ended.
Projected Total: This is the expected final amount of the job; the total retail price.
Select Estimate: This drop-down will allow you to select the estimate tied to this particular job. The Go button will take you directly to the estimate.

Contract No.: If you have signed a contract for this job, please enter the Contract No. here.
Contractor’s Job No.: The Contractor’s Job No. should be entered here.
Description: A short description of the job you are performing for the customer.
Job Details: This space is provided to allow you to enter a more detailed description of the job, phase, or scope of work.
Figure 43: Job Details
Additional Overhead: Check this option if you wish to assign additional overhead to this job. Total Office Manager already keeps track of all expenses that you specifically assign to this job (such as when you write checks or enter bills). This feature simply allows you to add some extra overhead to the job. This is handy when you wish to apply a small amount of rent, taxes, and other items against this job.
Assign Overhead as a Percentage of Final Amount: Select this option and enter a percentage of the retail price to consider as overhead. An example may be 35% to cover general and administrative costs of doing this job.
Assign Overhead as a Dollar Amount: Select this option if you wish to use a fixed dollar amount to serve as general and administrative overhead for this job.
Labor Burden: This amount is any expenses associated with employing your workers other than expenses associated with the actual job. For example, worker’s comp, pension cost, health insurance, liabilities already included, etc.
Credit Hold: When checked, the Credit Hold checkbox places the customer on a credit hold status. When on credit hold, a notice appears whenever the customer record is opened. When an attempt is made to create a new invoice, sale, or work order for a customer on credit hold, a special permission warning appears which requires authorization from the Total Office Manager Administrator to proceed.
Additional Customer:Job Information
When editing an existing customer, the following information on your screens will change. At the top of the Customer:Job screen, Customer Name becomes Display Name. Additionally, Service Agreement information and Financial History will appear indicating whether there is a Service Agreement assigned to this Customer:Job and if there has been any Financial History associated with this account. There will also be a Customer Balance Summary with aging information for this customer. If this customer is tied to a Family (Parent/Child/Grandchild), you will be able to select whether or not you want to show the family balance.

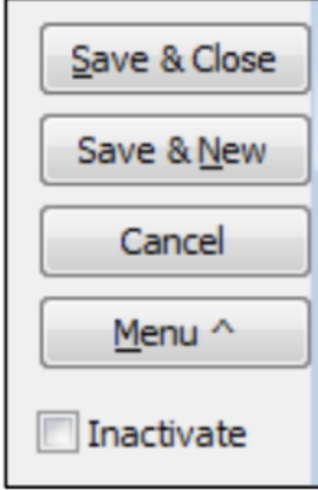
To Inactivate a Customer at any time, you just need to select the Inactivate option. This option can be found on the right-handside of either the New Customer:Job or Edit Customer:Job screen.
Figure 45: Inactivate